
Google Ads Conversion Tracking Guide (2021 Update)
To evaluate the performance of your Google Ads campaigns, you need to enable conversion tracking.
With conversion tracking, you’ll be able to track, measure and analyze the actions performed by users after they click on your Ads.
In this guide, you’ll learn how to create conversions in Google Ads, how to add the google ads conversion code on your website, and how to view conversion-related data in Google Ads.
Let’s get started with some basic definitions.
What is a Conversion?
A conversion is an important action that users perform on your website. It can be something critical such as a purchase, call, or newsletter signup or a step that users take before converting such as an add to cart and begin checkout.
There is no limitation as to what you can consider as a conversion.
Each website has different goals and conversion can be anything from visiting a key page on your site, submitting a contact form, or viewing a video.

What is important when optimizing your Google Ads campaigns is to optimize them based on conversions with a monetary value.
When the conversion has a value, you’ll be able to calculate important metrics like CPA (how much it costs you to get a conversion through ads) and evaluate the profitability of your campaigns.
What is Google Ads Conversion Tracking?
Google Ads conversion tracking is the way to measure conversions performed by users after they interacted with one of your ads.
In other words, when you enable conversion tracking for your Google Ads, you’ll be able to see how many conversions were generated because of your Google Ad campaigns.
Without conversion tracking, you won’t be able to optimize your campaigns so this is a step to perform before you execute your first Google Ad campaign.
To enable Google Ads conversion tracking, you first need to create the conversions in Google Ads and add the tracking code on your website.
How to Create Conversions in Google Ads
Let’s get started with the first step: creating conversions in Google Ads.
Login to your Google Ads account, click the Tools & Setting option from the top menu and then select Conversions.

Select the kind of conversions you want to track by choosing one of the available options.
Website Conversions
Select this option if you want to track actions on your website like:
- Sales
- Newsletter Signups
- Visit of an important page
- Click of a button
App Conversions
Select this option to track actions on your app like:
- App installs
- Purchases made from your app (in-app purchases)
- Actions performed on your app (clicks on specific buttons, visit of specific pages)
Phone Calls
Select this option to track calls to your business initiated from:
- Your Google Call Ads
- A number that is shown on your website
For the purpose of this guide, we want to track website conversions, so select the first option (Website) and continue to the next step.
Category: Select a relevant category from the list. Don’t worry if you choose the ‘wrong category’, this is just for organization and reporting purposes.
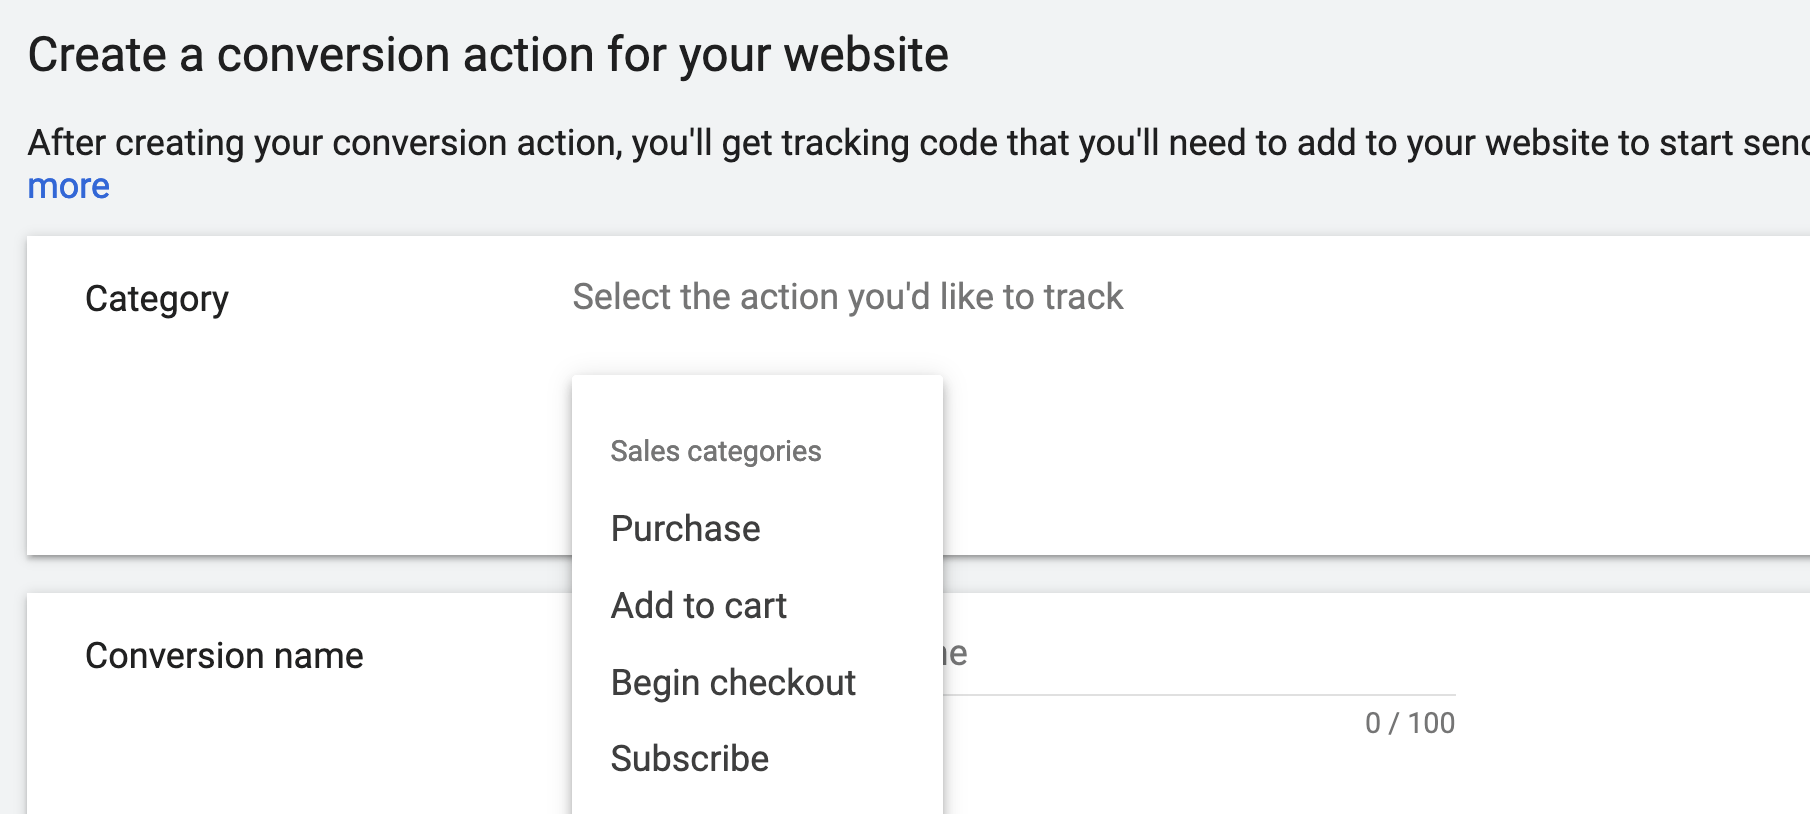
Conversion Name: Provide a meaningful name for your conversion. For example, ‘Digital Bundle Sale’, ‘Newsletter signup’.
Next, you need to select how you want to deal with conversion value.
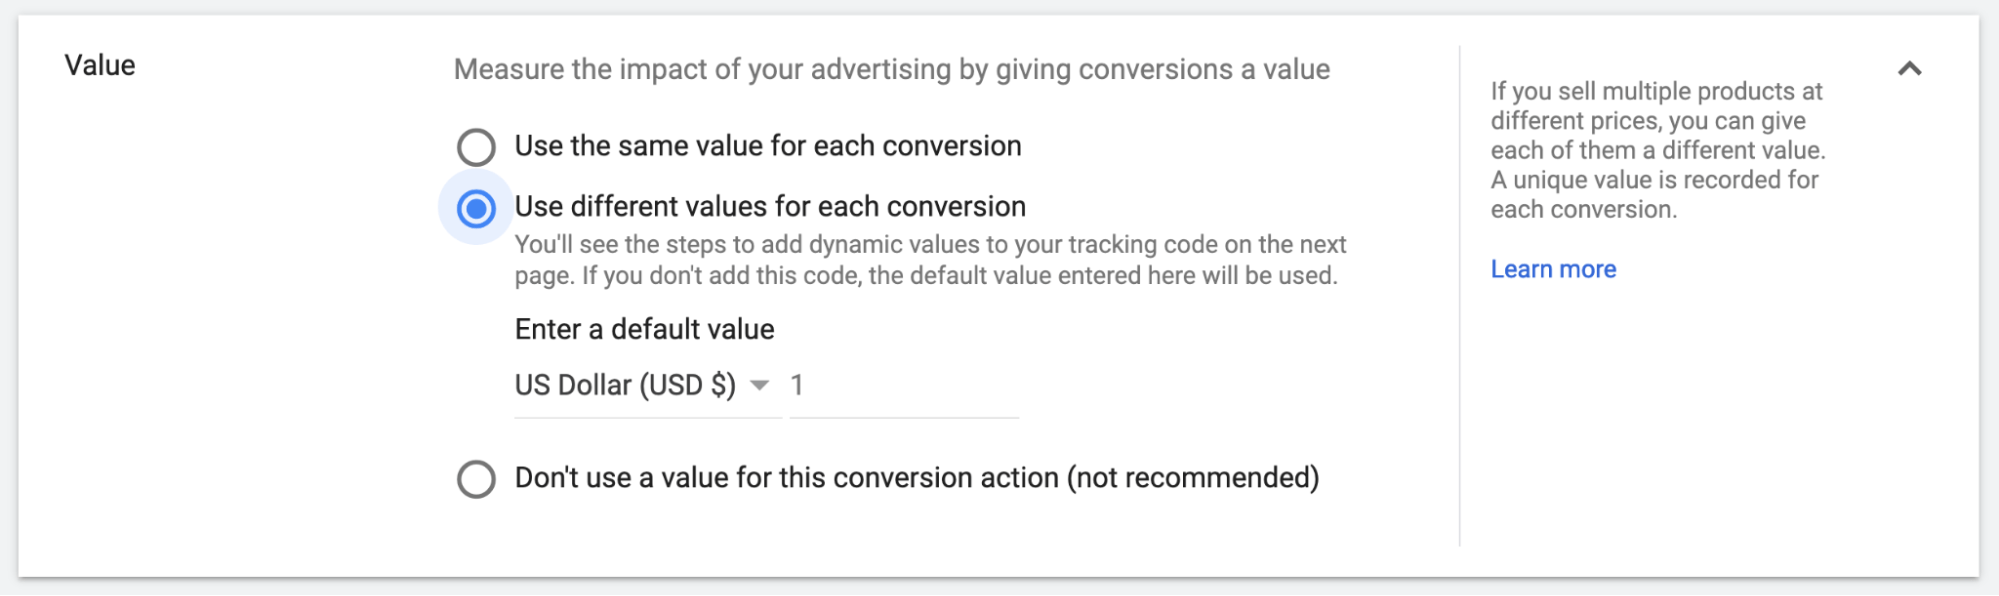
Value: This refers to the monetary value of a conversion. In other words, the value for your business if the particular conversion is generated from your Google Ads.
Some tips to help you configure this correctly:
If you’re creating a conversion to track how many people signup for your newsletter then use the first option “Use the same value for each conversion”.
If you’re creating a conversion to track sales then use the second option “Use a different value for each conversion’. We’ll see below how to adjust your tracking code to ‘pass’ the sale value to Google Ads.
Count: This represents how many conversions to track per click. Leave it to ‘Every’ and proceed with the next setting.

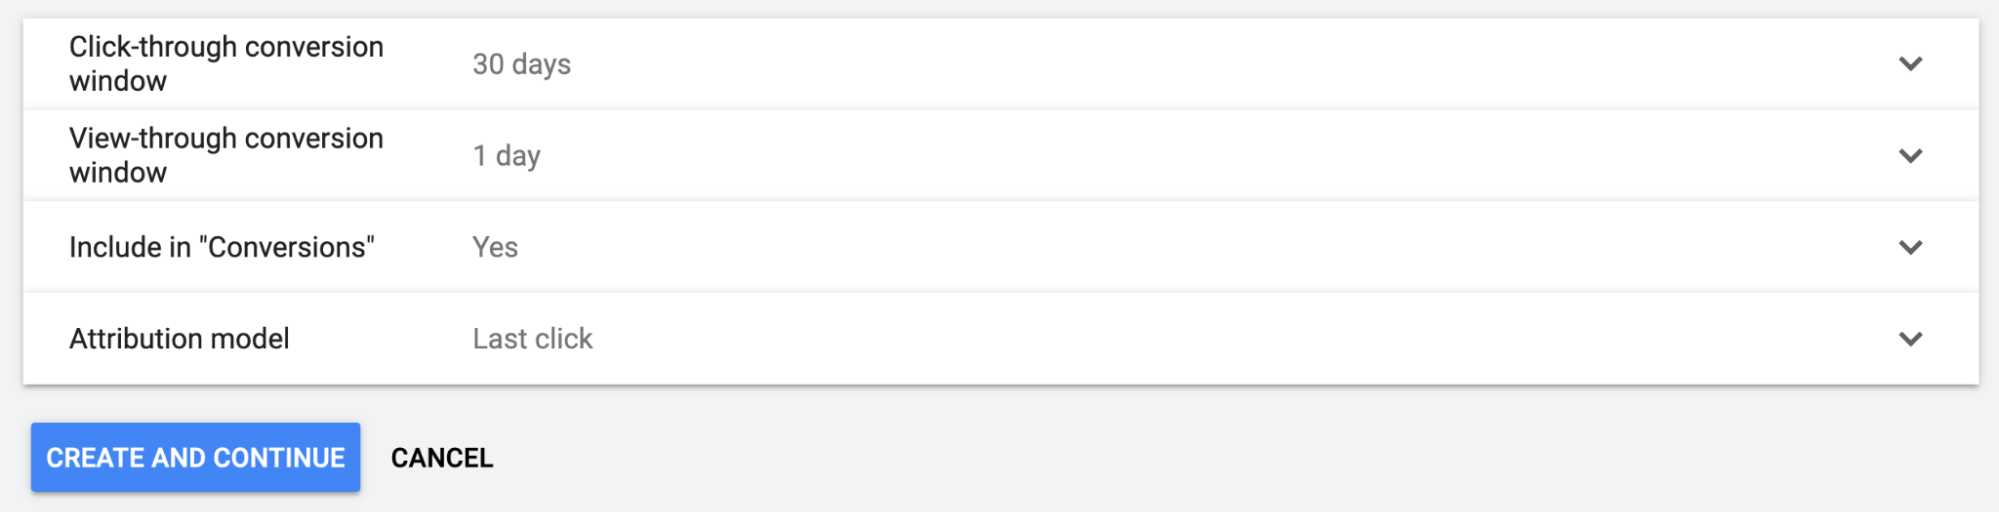
Click-through conversion window: This value represents the number of days you want a conversion to count from the first time someone interacts with your ads.
For example, if you set this to ‘30 Days’ it means that if a user clicks on your ad and converts within 30 days, you’ll see it in your reports as a conversion. If the conversion happens after 30 days, it won’t be recorded in Google Ads.
The value to set here depends on how many days on average it takes for a customer to convert. Setting this to ‘30 Days’ works for most cases but you can adjust it according to your business goals.
View-through conversion window: The number of days you want a conversion to count from the first time someone sees your ad, but without interacting with it.
For example, you may have a search campaign enabled targeting specific keywords. Someone searching Google for related terms sees your ad, and later visits your website and convert (without clicking on your ad).
The problem with ‘view-through conversions’ is that you don’t know for sure if the conversion happened because of your ad or any other factors. So, set this value to the minimum which is 1 day.
Include in ‘Conversions’: Set this to ‘Yes’ if you want the particular conversion to be included in your reports.
If you set this to ‘No’, conversions will still be recorded but they will show in the ‘All Conv. Column’ in the reports.
For ALL the conversions you want to optimize your campaigns for, set this column to YES. For conversions, you want to track their performance but are not critical for optimization, set this to NO.
Attribution model: Set this to ‘Last click’. This basically determines how much credit each click gets for your conversions. You can learn more about the Google Ads Attribution model here.
Once you’re done creating your first conversion, you should repeat the process to create a conversion definition for each conversion action you want to track.
How to Add Google Ads Conversion Tracking Code to Your Website
To start tracking conversions, you need to add the conversion tracking code to your website.
The conversion tracking code (also referred to as a converting tag or PPC tracking code), is a piece of code that establishes the connection between your website and Google Ads.
This is how Google Ads knows what happens after someone clicks an ad and visits your website.
When you click the Tag Setup toggle, you are presented with three options.
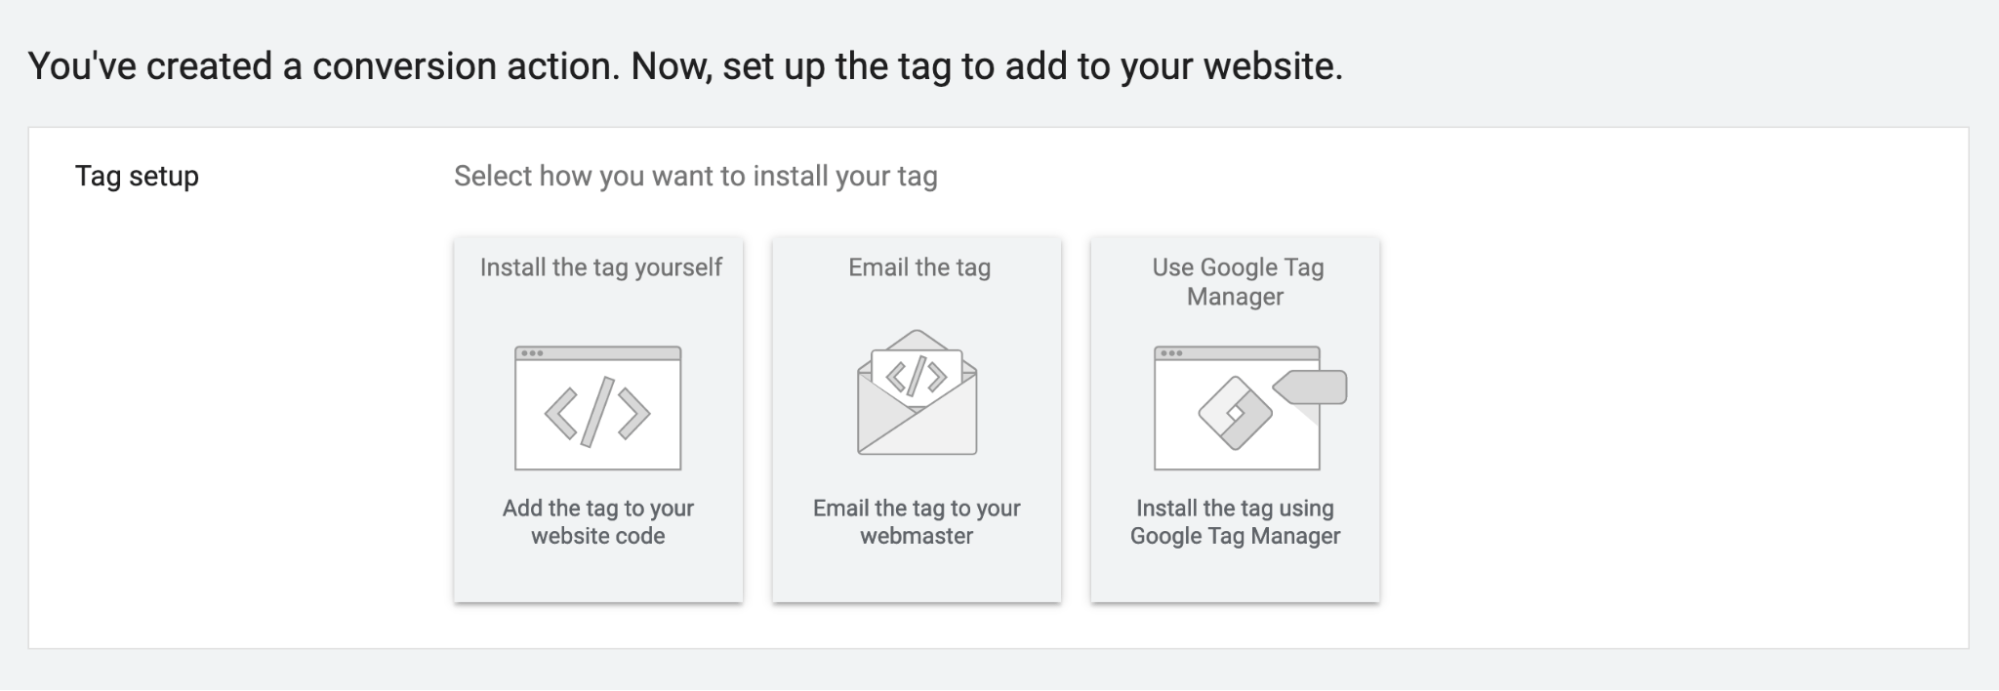
The first option is instructions to install the tag yourself, the second option is to email the instructions to a developer, and the third option is instructions on how to add the code using Google Tag Manager.
Click Install the tag yourself and proceed to the next step.
Assuming that you already have Google Analytics code installed on your website, select the second option (as shown below) and proceed to the next step.
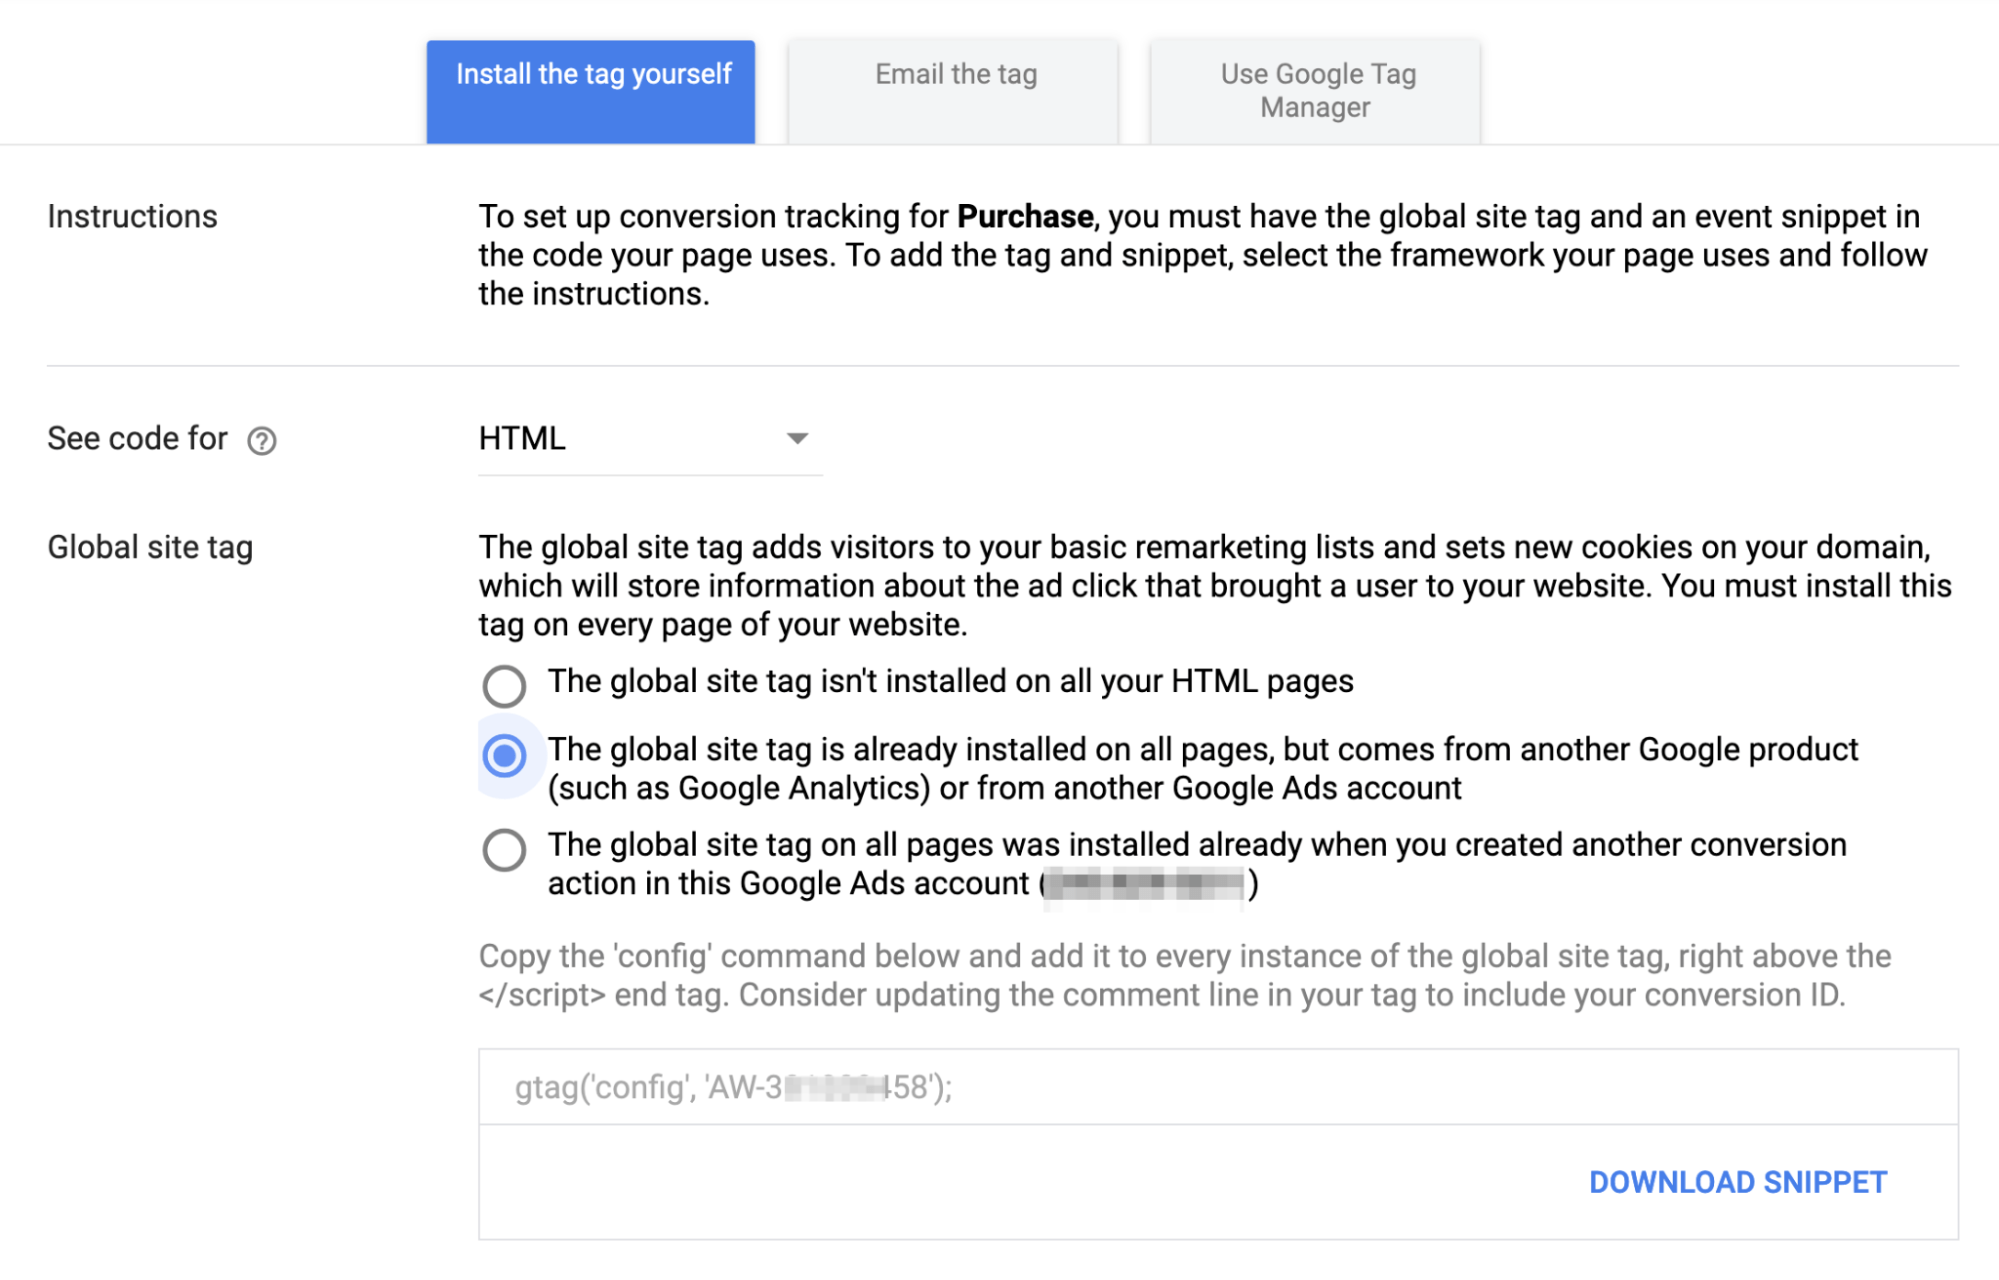
If you don’t already have Google Analytics installed select the first option and follow the provided instructions.
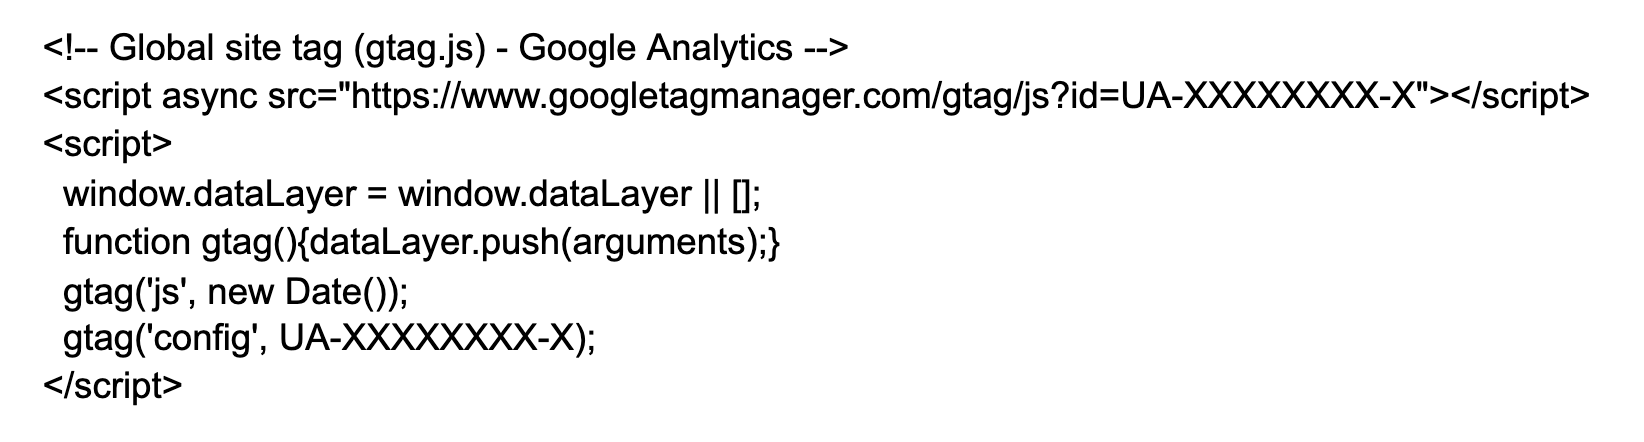
Locate the Google analytics code added already on your website. This is usually in the HEAD section. It should look something like this:
Copy the gtag given by Google Ads and paste it before the end of the closing </script> tag. Your code should now look like this:
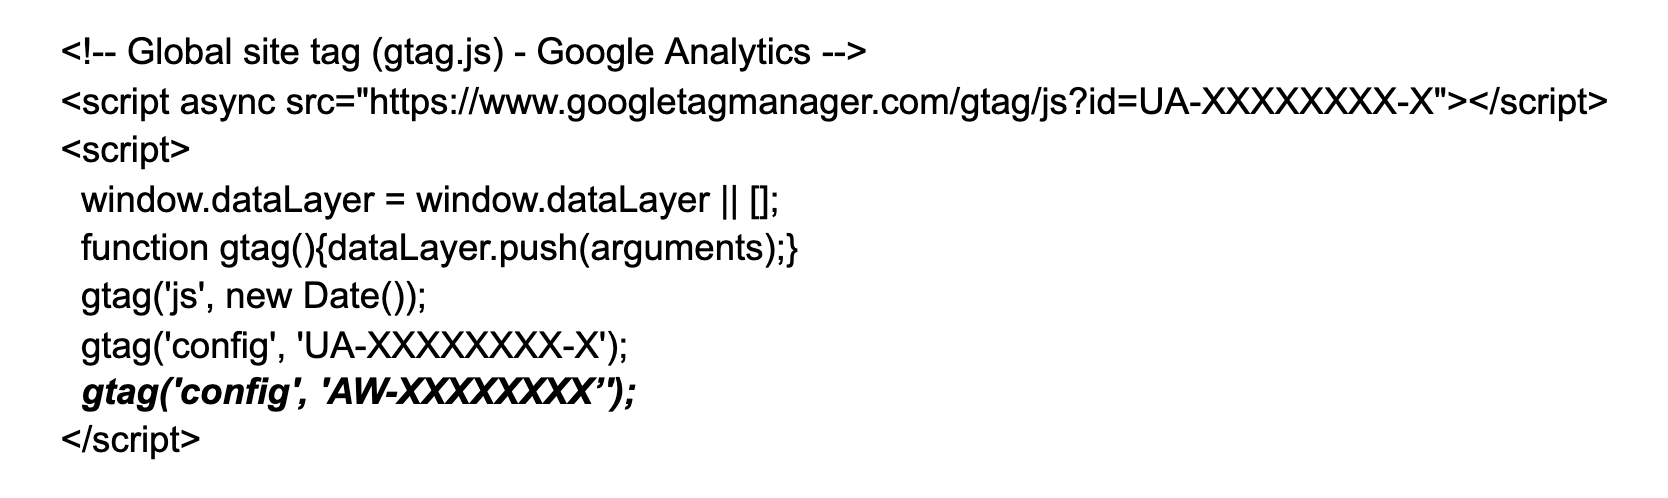
You’ve just added the Google Ads code to all pages on your website that Google Analytics is installed.
NOTE: You only have to do this step once. After adding the Google Ads tag in your analytics code, you should select the third option for subsequent conversions.
Google Ads can now track views of a particular page but that’s not the end of the story.
The next step is to add a piece of code to the page users visit after completing a conversion, this is usually referred to as a ‘Thank you’ page.
For example, if you want to track newsletter sign-ups, you should configure your website to redirect users to a dedicated ‘Thank You’ page after the sign-up process is completed.
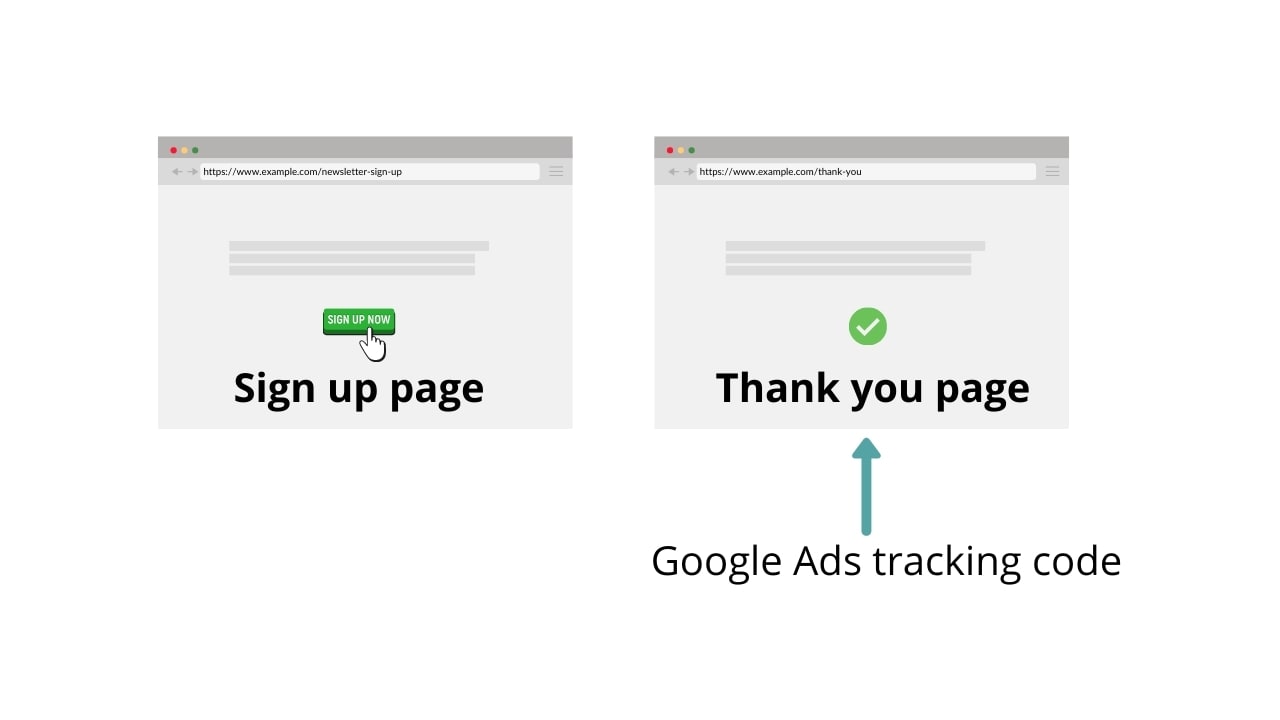
To do this, you need to get the code provided by Google Ads and add it to the <head></head> of the page.
If you sell products that have a different value, you need to do some adjustments to the code so that the purchase value is passed on to Google Ads.
Let’s see how to do this for the most popular platforms.
How to Add Conversion Tracking Code to WordPress
If you’re on WordPress and have already performed Step 1 above (adding Google Ads tag to your Google Analytics), the next step is to add the tracking code to the ‘Thank You’ page.
There are two ways to do this:
The first way is to add it via custom code with the help of a developer and the second way manually with the help of a plugin.
We will go through the steps of the manual method.
1) Install and activate the AddFunc Head & Footer Code plugin.
This plugin will add a new section on all your posts and pages allowing you to add custom code to the head, body, or footer.
2) Edit the page users visit after they convert and copy the tracking code provided by Google Ads in the Head section, as shown below.
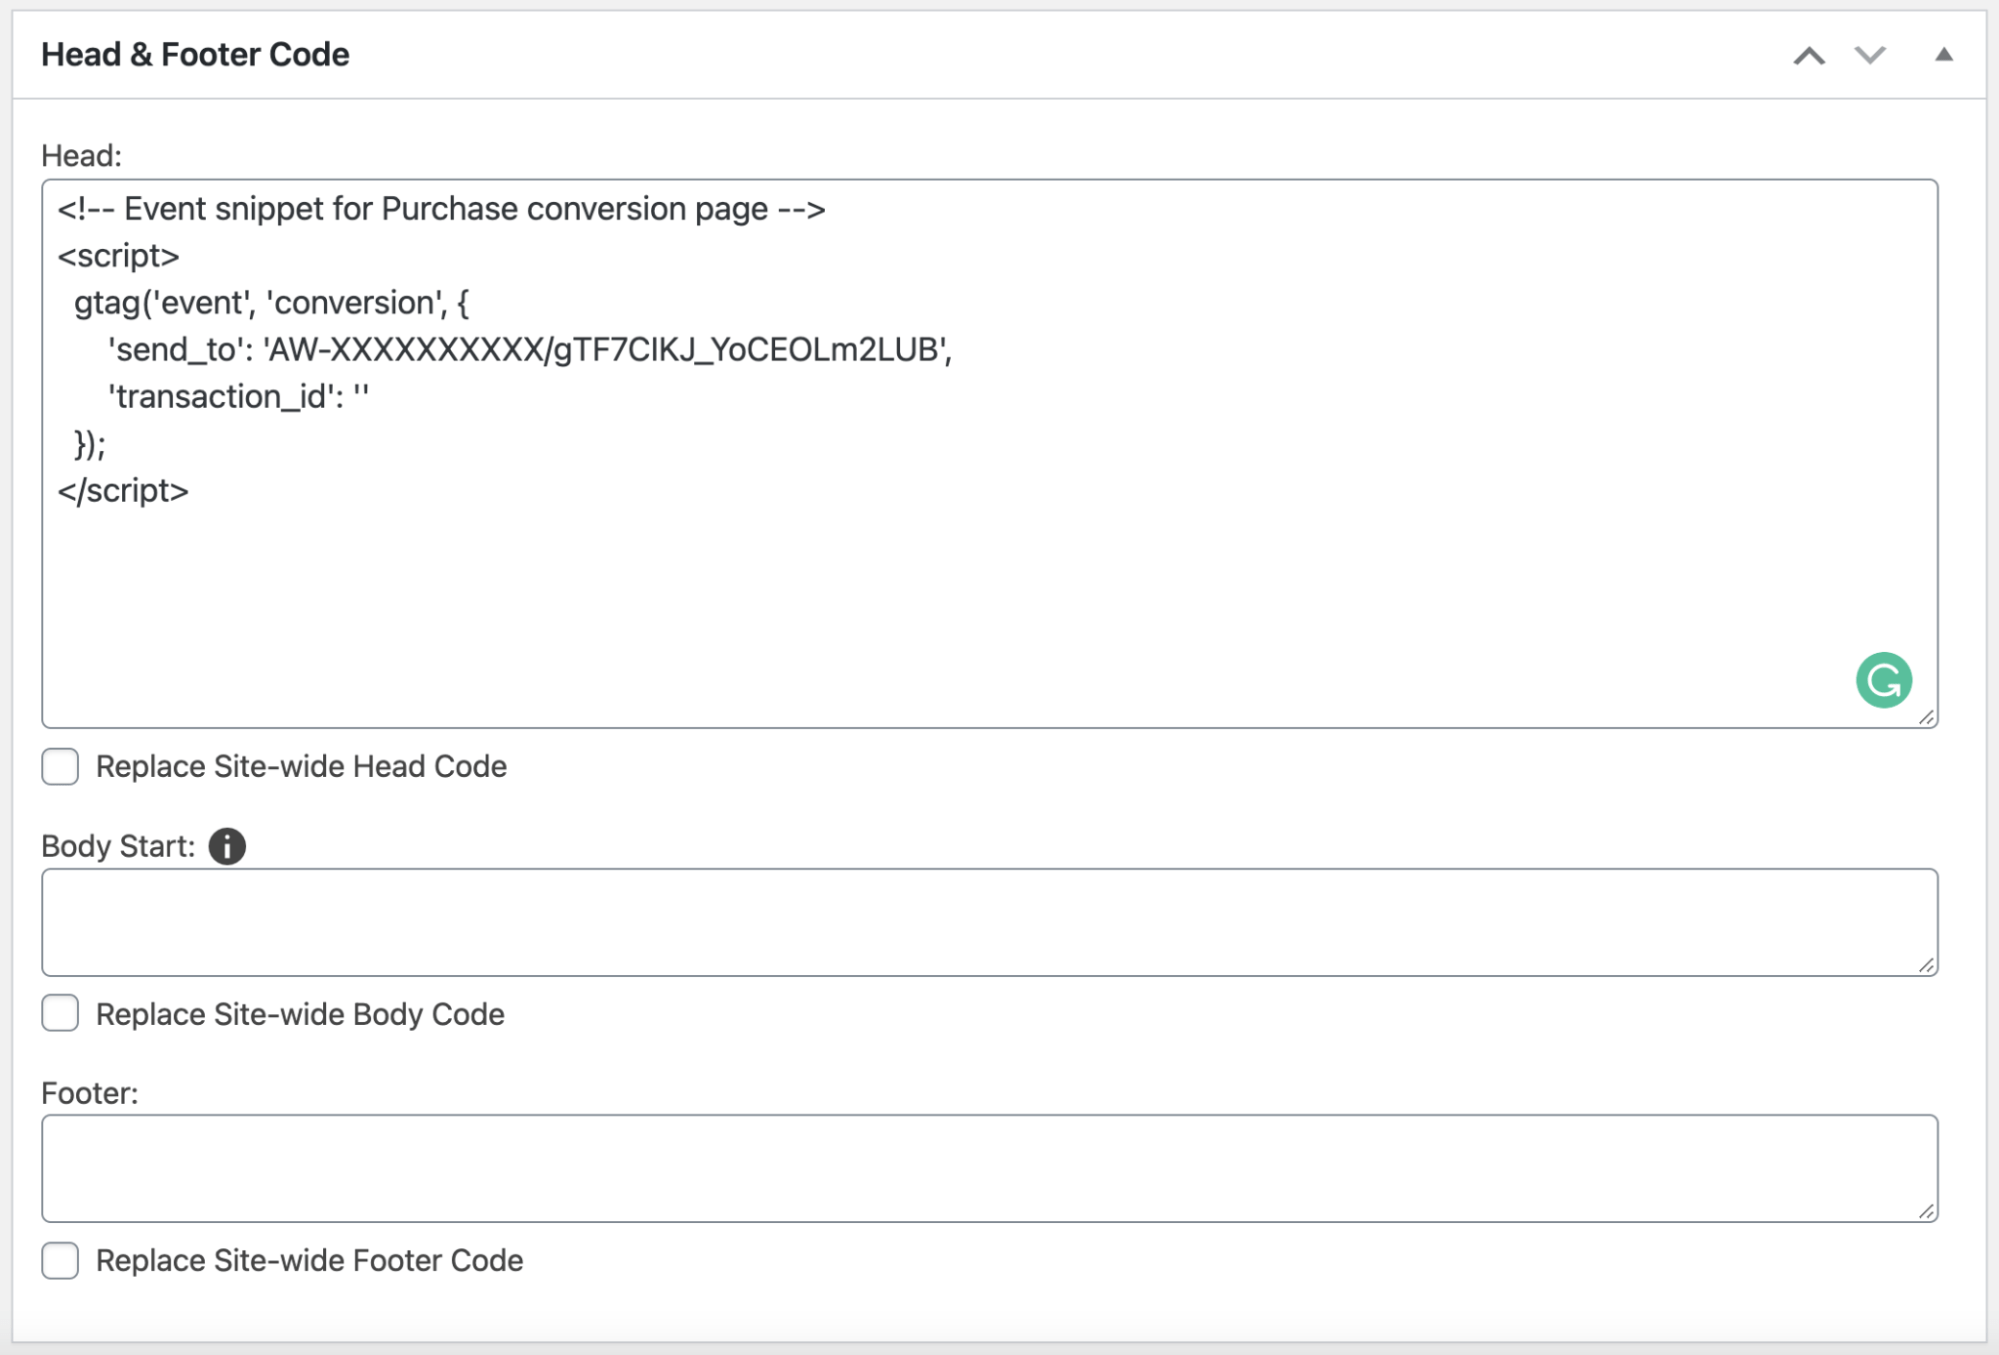
3) Update the page to save your changes.
Now every time a user visits the particular page after interacting with one of your ads, the conversion will be recorded and shown in your Google Ads reports.
You need to repeat this step for all the different conversions you want to track.
How to Add Conversion Tracking Code to Woocommerce
In this section, you’ll learn how to add the Google Ads tracking code to a Woocommere shop.
If you have an eCommerce store selling products with a different value, you need to perform some minor adjustments to the conversion tracking code to pass the purchase value to Google Ads.
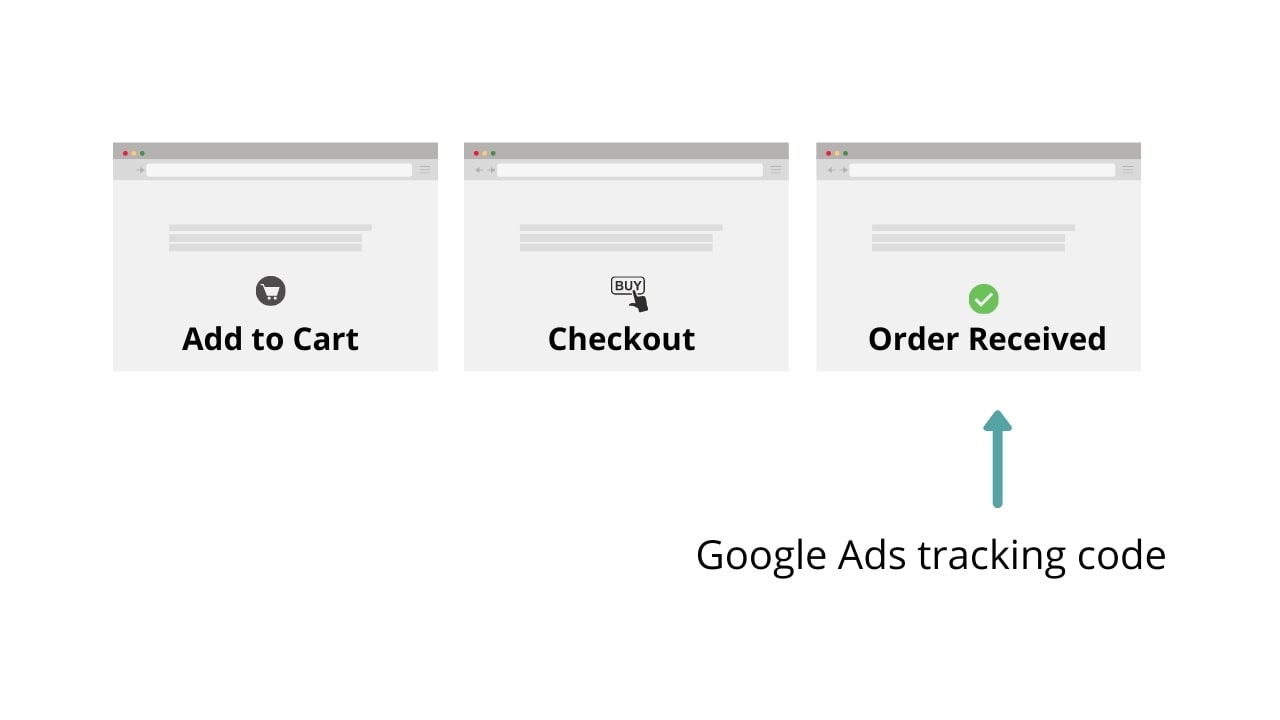
By default when a transaction is completed successfully (after checkout), users are redirected to the Woocommerce ‘Order Received’ page.
Adding the code requires making changes to your functions.php file. If this task is too technical for you, it’s better to get the help of the developer.
Basically, all you have to do is to edit your functions.php and add the following code. This code gets executed when an order is finalized. It gets the value of the order and sends this to Google Ads.
add_action( 'woocommerce_thankyou', 'Google_ads_tracking' );
function Google_ads_tracking($order_id) {
$order = new WC_Order( $order_id );
$totalValue = $order->get_total();
?>
<?php
if ( empty( $totalValue ) ) {
$totalValue = 0;
} else {
$totalValue = preg_replace( '/([^0-9\.])/i', '', $totalValue );
}
$totalValue = number_format( $totalValue,2, '.', '' );
?>
<!-- Event snippet for Purchase conversion page -->
<script>
gtag('event', 'conversion', {
'send_to': 'AW-XXXXXXXX/d_qrCN6n1NoBENj-guAD',
'value': '<?php echo esc_html( $totalValue ); ?>',
'currency': 'USD',
'transaction_id': '<?php echo esc_html( $order_id ); ?>'
});
</script>
<?php
}
NOTE: You should replace ‘AW-XXXXXXXX/d_qrCN6n1NoBENj-guAD’ with the tracking code provided by Google Ads.
How to Test Google Ads Conversion Tracking
There are two ways to test that your conversion tracking code was added correctly.
The first way is to check the Conversion report in Google Ads and the second way to use the Google Tag Assistant tool.
How to Check Conversion Status in Google Ads
- Sign in to your Google Ads account.
- Click the Tools option (top right corner)
- Click Conversions (under Measurement).
Look at the tracking status column, if the status code is:
No recent conversions or Recording conversions then everything is ok.
Unverified then you should try and navigate to the pages you added the code or perform a test purchase and check back again in 24 hours.
How to Check Tracking Code using Google Tag Assistant
Go to Google Tag Assistant and click the ADD DOMAIN button. Enter your website domain and click CONNECT.
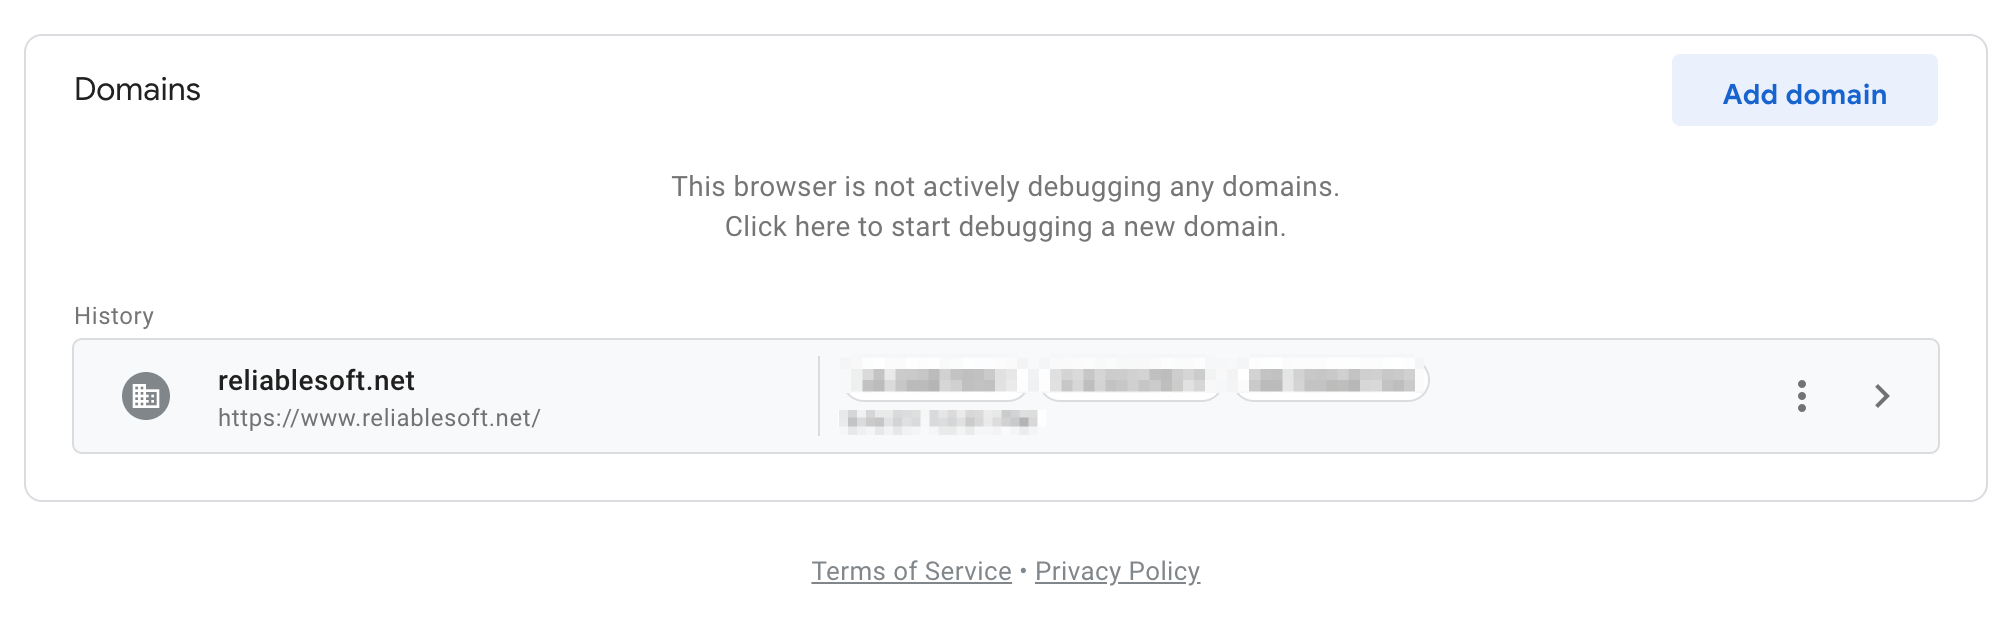
A new window will open. Navigate to your website pages the tracking code was added (you may have to generate some test transactions) and then go back to the Google Assistant window to view the reports.
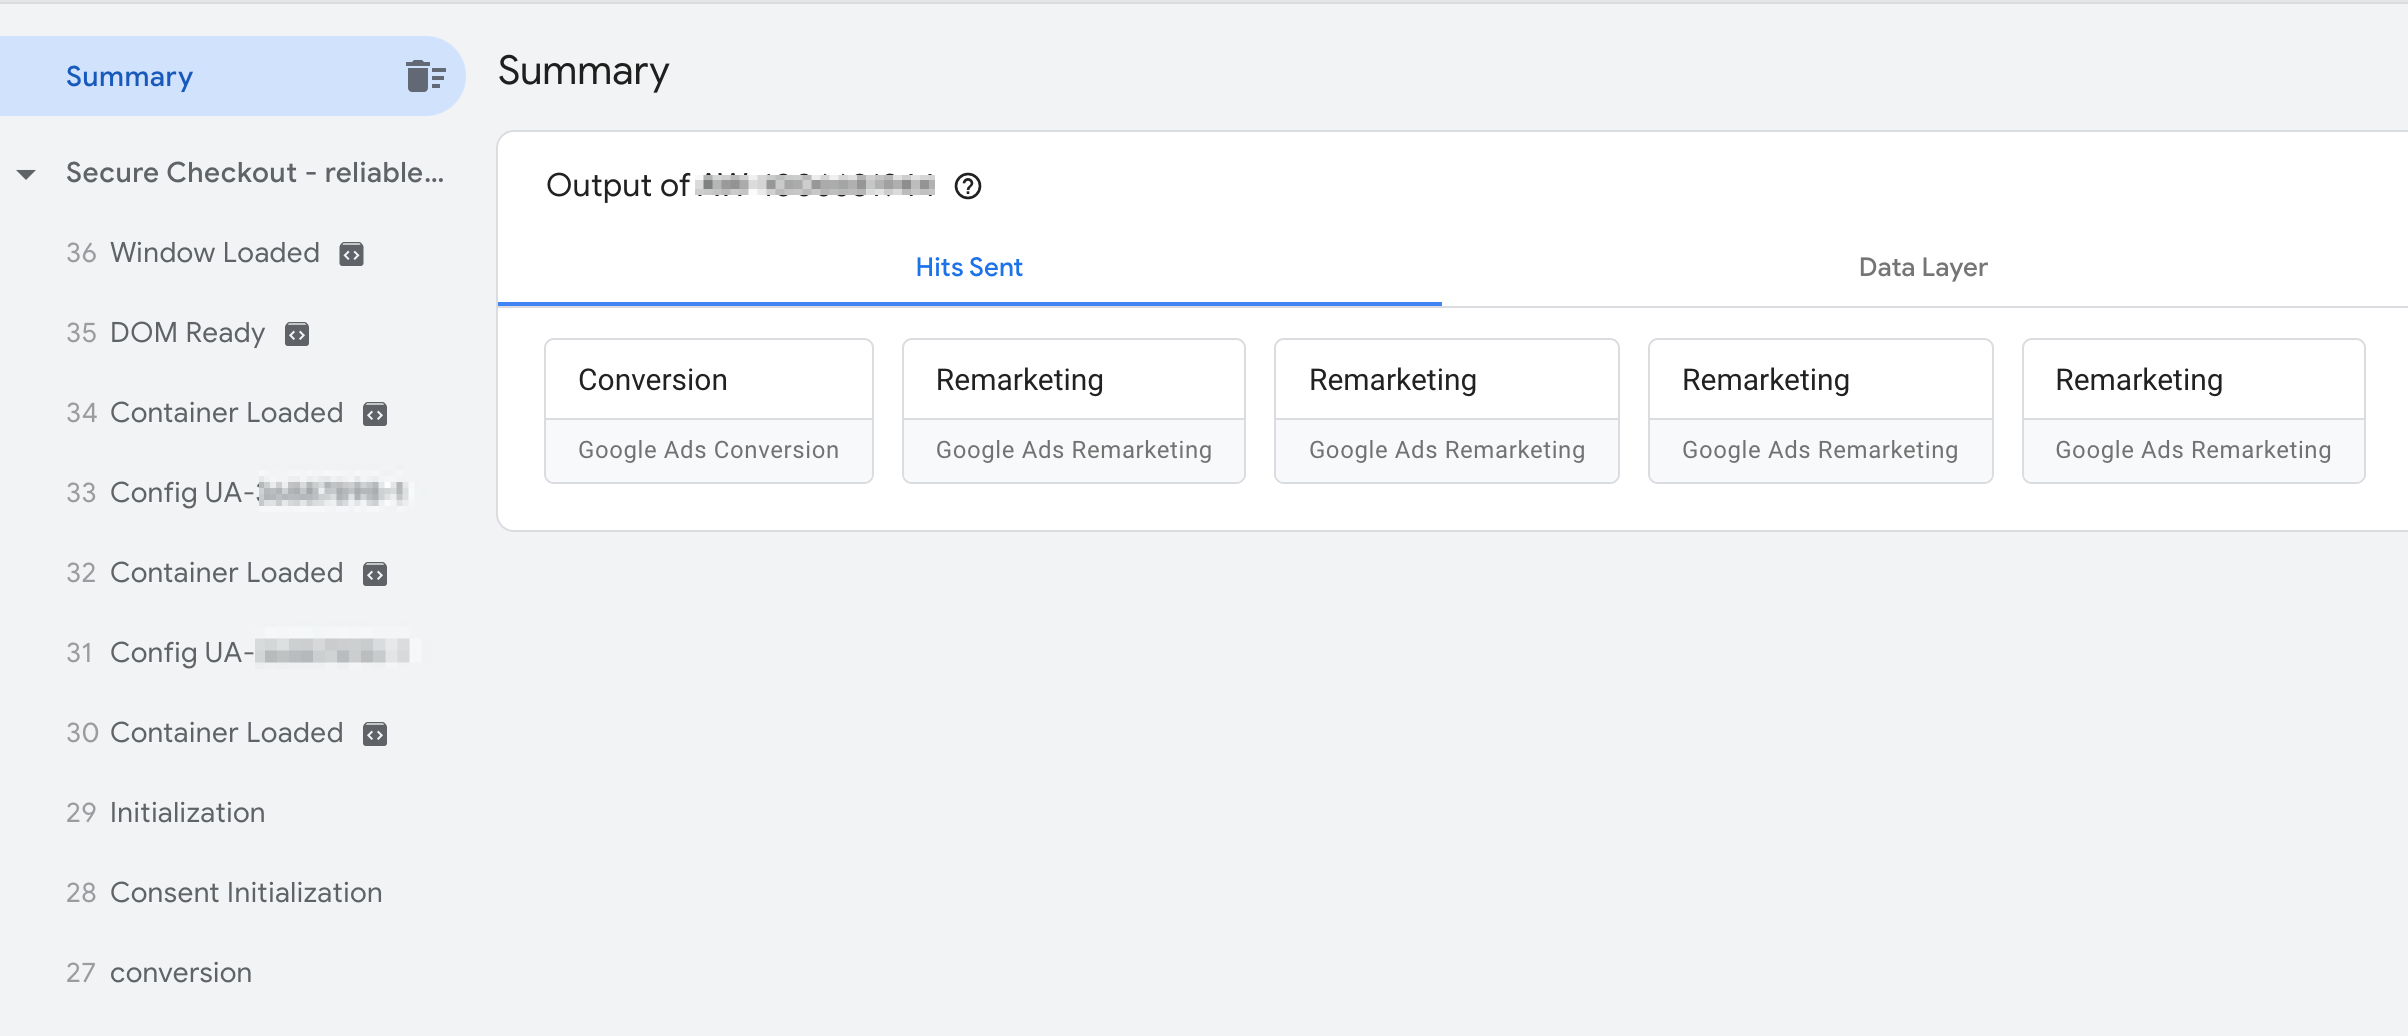
Look for the Google Ads container and click the ERRORS column to view any reported issues.
How to See Conversions Data in Google Ads
To check how many conversions your campaigns generated, you can view the ‘Conversions’ and ‘All Conversions’ columns in your reports.
The Conversions column includes all conversions where the ‘Include in Conversions’ setting is set to Yes. In other words, this is the number of conversions recorded because a user interacted with one of your ads and converted on your website.
The All Conv. columns include ALL conversions even if the ‘Include in Conversions’ setting is set to No.
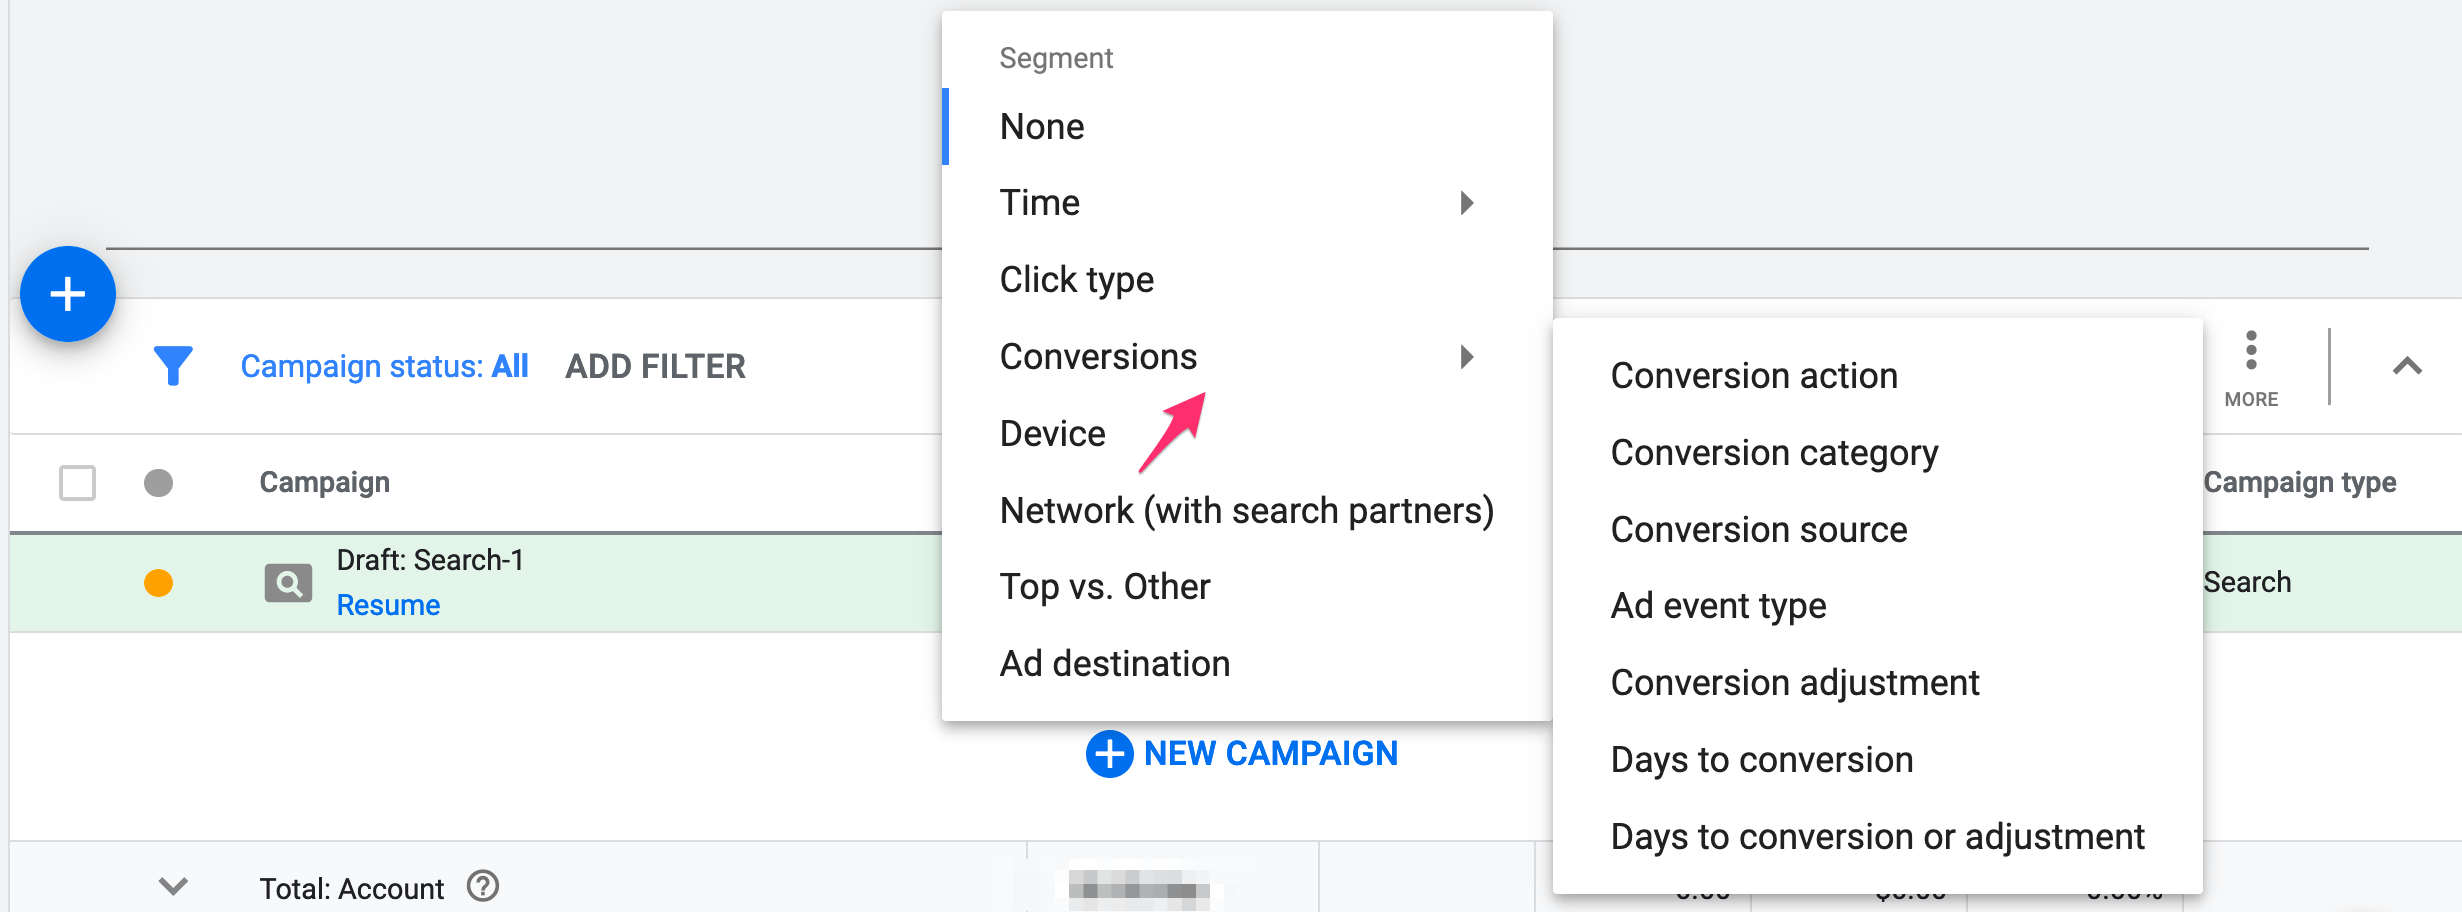
Click the SEGMENT option, select CONVERSIONS and choose one of the available options to view more detailed data about your conversions.
Key Learnings
Two important actions to perform before starting any Google Ads campaigns are to set up the conversions in Google Ads and add the conversion tracking code on your website.
Without conversion tracking enabled you won’t be able to evaluate or optimize your campaigns.
The first step is to create conversions to track important actions that you want users to perform after clicking an Ad. The most common types are a call to your business, a sale, and a signup to your newsletter.
The second step is to add the tracking code to your website. This involves two parts. The first part is to add a code to all your website pages.
If you have Google Analytics installed then you can adjust your Analytics code to include the Google Ads code without having to add a separate script on your site.
The second part is to add the specific code to your ‘Thank You’ pages. For conversions that have the same value, it’s as simple as copy/paste the code provided by Google Ads to the Head of your page.
For conversions that the value is different (like selling various products through a Woocommerce website), you need to make simple changes to the code to ‘pass’ the purchase value to Google Ads.
This is a bit tricky and if you’re not sure how to edit your website’s files, it’s better to assign this task to a developer.
Once you have your code installed, the next action is to test that everything is working ok by visiting the Conversion report in Google Ads or through the Google Tag assistant.
Finally, you can view conversion-related data by adding the Conversions and All Conv. columns in your Google Ads reports.