Google Website Verification in Search Console: 5 Easy Methods
If you’re a website owner, Google Search Console offers a vital connection you can establish with Googlebots.
In fact, it’s quite similar to the Na’vi bond or neural connection depicted in the Avatar movies. Once you establish the connection between your website and the Search Console, the dashboard lights up with a wealth of valuable information that can be used to optimize and analyze your website.
Did you know that with a single Search Console account, you can keep track of up to 100 domain names?
But for all that to work, including the most important aspect of submitting your website’s sitemap to Google, you need to verify that you’re the legitimate owner of the domain name.
So, how can you establish this crucial connection between your website and the Search Console? The answer to this is by verifying it.
In this blog, we will discuss different methods that you can use to verify your website with Google Search Console.
While most of the methods listed here can be implemented with basic HTML and WordPress knowledge, there are a few others that may require the help of your website administrator or your web developer.
Want to see your website at the top? Don’t let your competitors outshine you. Take the first step towards dominating search rankings and watch your business grow. Get in touch with us now and let’s make your website a star!
5 Google Recommended Methods to Verify Your Website on Search Console
All the methods described here can be implemented on websites running on any CMS platform, including WordPress, Joomla, or Shopify. All that you need to do is place the tags and files in the right place or directory.
Before going to the different methods, you need to first familiarize yourself with the initial step of adding your website to the search console.
Once you log in to the Google Search Console, you can find a left navigation bar. At the top of that, you have an option labeled ‘Search Properties’.
When you click the search box, a drop-down appears with a ‘+’ symbol labeled ‘Add Property’. Click on the Add Property button.
Once you click on the Add Property button, you will see a pop-up message asking you whether you are planning to verify a domain or a URL Prefix.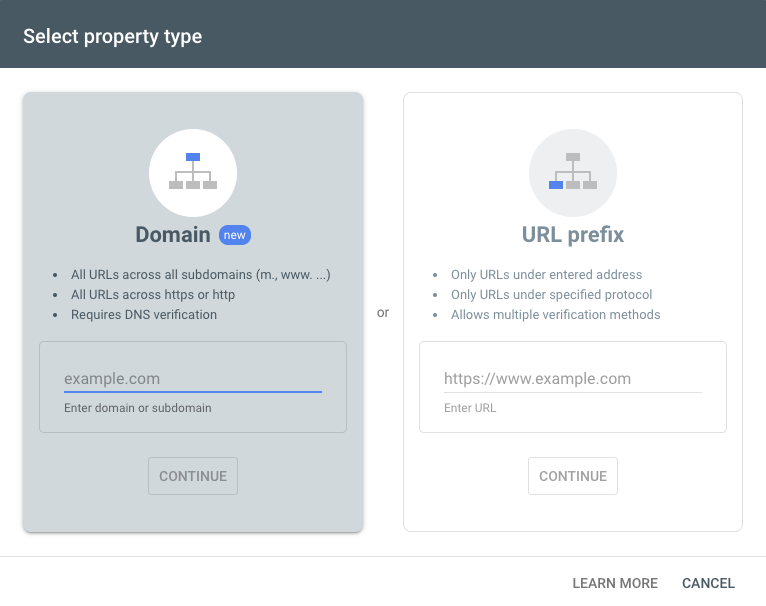
Domain Property: This will verify all the subdomains and other variations of your website such as the m.example.com, HTTP/HTTPS version, etc. However, to verify the domain property, you need to implement the DNS verification method, which we will talk about in detail later.
URL Prefix: The second option at your disposal is to add a URL Prefix. What this means is that one version of your website that you want to add. For example – https://www.example.com/. When you add the URL Prefix, you get to verify your website on the search console using multiple methods, which are easier to implement. However, keep in mind that adding this property type will restrict the data to the single address and protocol that you have selected.
Now that you have added the property, you will enter a new popup message that lists all five site verification options that we will discuss in detail.
Method 1: Search Console Verification Using HTML File
The first method that you see is to verify your website using an HTML file.
This method is easy for website owners and webmasters to have access to the server and file manager/FTP.
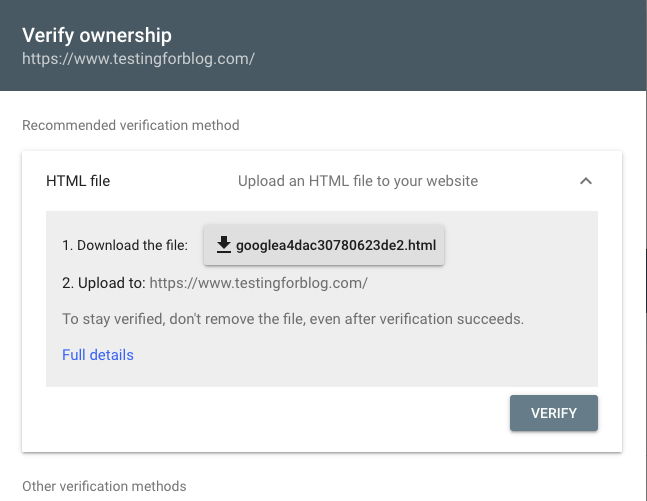
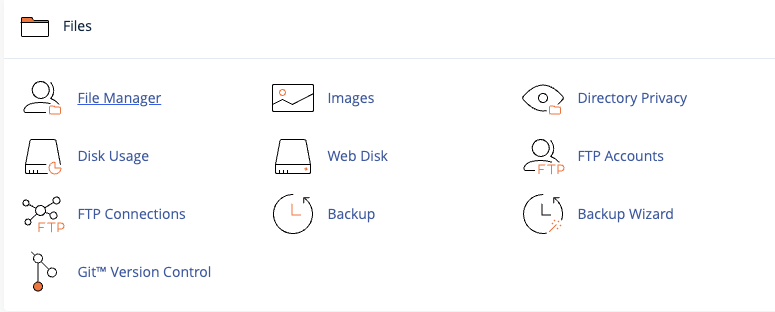
If you already have access to the file manager via the CPanel or FTP access through a tool like FileZilla, all that you need to do is download the HTML file displayed in the search console and upload it to the root directory of your website.
Here is a step-by-step process of doing this
Step 1: Download the HTML file from Search Console
Step 2: Log in to cPanel and Open the File Manager
Step 3: Identify the Root folder of your website
Step 4: Upload the HTML file to the root folder
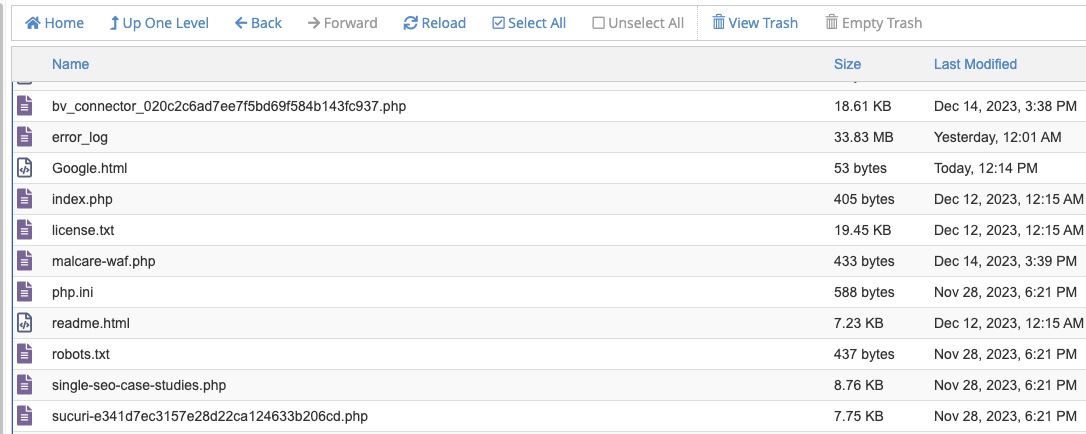
Once you have uploaded the HTML Verification file to the root folder of your website, come back to the search console dashboard and hit the Verify button.
If the code is placed in the correct directory, your website will be verified in the Search Console, allowing you to upload your sitemap. In a few days, the data will start getting populated and that means you got it all done.
Method 2: Search Console Verification Using HTML Tag
If you’re not technically inclined, like I was 10 years ago, then this is the method you would likely prefer.
If your website is hosted on WordPress and uses an SEO plugin like Yoast or RankMath, this will be the easiest method for verifying your website with Google Search Console.
All that you have to do is copy the HTML Tag displayed in the popup and paste it in the section of your website. If you have a cache plugin installed, clear the cache and hit the verify button in the search console. You should be good to go.
If you are using Yoast Plugin, here is how you verify search console using HTML tag
Step 1: Go to Yoast inside your WordPress dashboard
Step 2: Click on Settings option and under it Site Connections
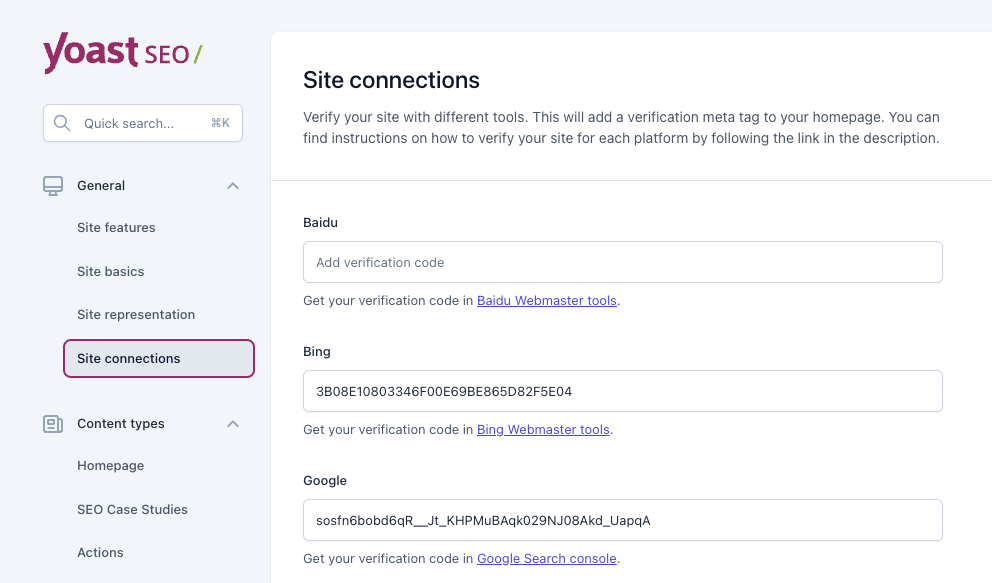
Step 3: Paste the HTML tag inside the Text field that says Google and Save
Step 4: Verify in search console popup
Verify search console using HTML tag on RankMath Plugin
Step 1: Open RankMath SEO Plugin in the WordPress dashboard
Step 2: Go to General Settings and under it Webmaster Tools
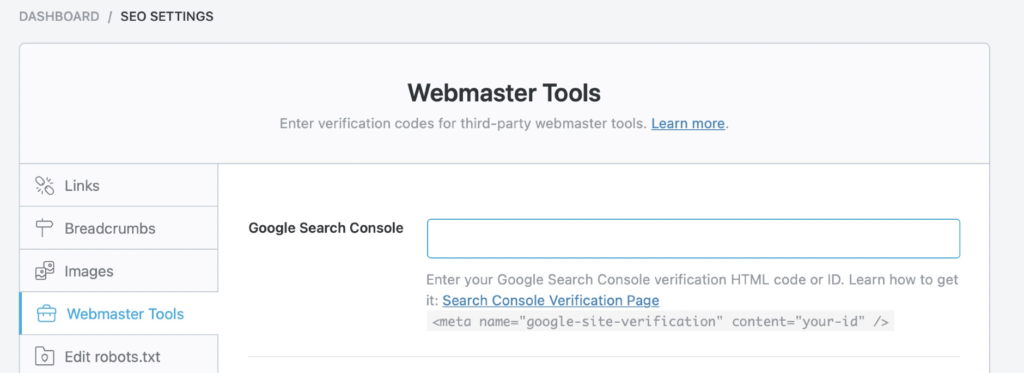
Step 3: Paste the HTML tag inside the Text field that says Google Search Console and Save
Step 4: Verify in search console popup
Method 3: Verifying Website Using Google Analytics Asynchronous Tracking Code
If you already have the Google Analytics tracking code installed on your website, the verification process is as simple as just clicking the verify button that you see in the search console. However, the analytics code must be present on the Homepage of your website.
If the Analytics code is dynamically inserted, which is the normal case, then you will by default have the code appearing on the Homepage. You must use the same Google account for both Search Console and Google Analytics for this process to work.
Method 4: Verifying Website Using Google Tag Manager Tracking Code
With most websites nowadays, Google Tag Manager is used instead of Google Analytics tracking code. It’s more convenient as GTM can include multiple tracking codes, which can help reduce the amount of codes you otherwise would use on your website.
This makes it yet another easy way to verify the website with a search console. All that you need to do now is click the verify button.
Method 5: Verifying Using DNS Record
If you are an advanced user with access and know-how about server management, you may prefer following this method to verify your site. However, we don’t recommend beginners to test this method, as any error in the server configuration will render your website as unavailable.
I’ll explain how it’s done in GoDaddy Account, but the process remains almost identical for any other service provider.
Step 1: Log into your GoDaddy Account: Access your GoDaddy account and navigate to your product page.
Step 2: Click on Manage DNS Records and select the domain you want to verify on Google Search Console.
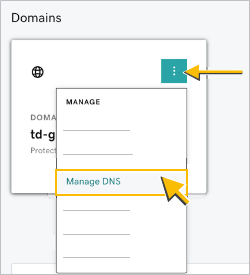
Step 3: Now you will enter the DNS settings area where you have to add a TXT Record that search console has displayed:
- On the DNS management page, click on “Add” to create a new record.

- Choose “TXT” as the record type.

- In the “Name” or “Host” field, you might need to type “@” or leave it blank, depending on your setup.
- In the “Value” field, enter the entire TXT value provided for verification in search console.
- The TTL (Time to Live) can usually be left as the default setting.
Step 4: Ensure you save the changes to add the new TXT record to your DNS configuration.
Once you have completed all the above steps, hit the verify button on the search console, and you should be good to go.
If you have completed any of the above 5 methods successfully, your website will pass Google site verification, and you can start seeing the data getting populated.
However, if you decide to remove the verification code from your website, Google may stop gathering data. So, make sure to leave the verification code intact.
If you need any additional help in verifying your website or optimizing it for better search appearance, click here and schedule a call with one of our SEO experts.
