
How to Use the New Video Editing App
I create video content for Instagram Reels, TikTok, YouTube, and LinkedIn, so I’m always looking for new tools to make the process smoother — and I may just have found my new favorite.
Instagram has just launched their brand-new video editing app, Edits by Instagram, and it’s already way surpassed my expectations. If you’ve ever tried to edit a reel with Instagram’s native video editing tools, you’ll know why I was a bit skeptical. Optimistic, but skeptical.
But Edits has not disappointed. The new app is lightyears ahead of Instagram’s built-in editing capabilities — which makes sense, given that this new app is meant to rival CapCut, the Swiss Army knife of video editing tools.
Edits is sleek, powerful, and surprisingly easy to use. I suspect that anyone creating content on mobile will really enjoy this (completely free!) app — whether you’re a video veteran or just starting out.
After some serious hands-on time with Edits by Instagram, here’s my everything guide, from getting started to tips and tricks to take you to the next level.
How to use Instagram Edits: The basics
Before we get into the tips, here’s a quick crash course in using Edits.
Step 1: Download + sign in
Head to the **App Store or Google Play**, search for “Instagram Edits,” and download the app. Then, log in using your Instagram account — no new profile is needed.
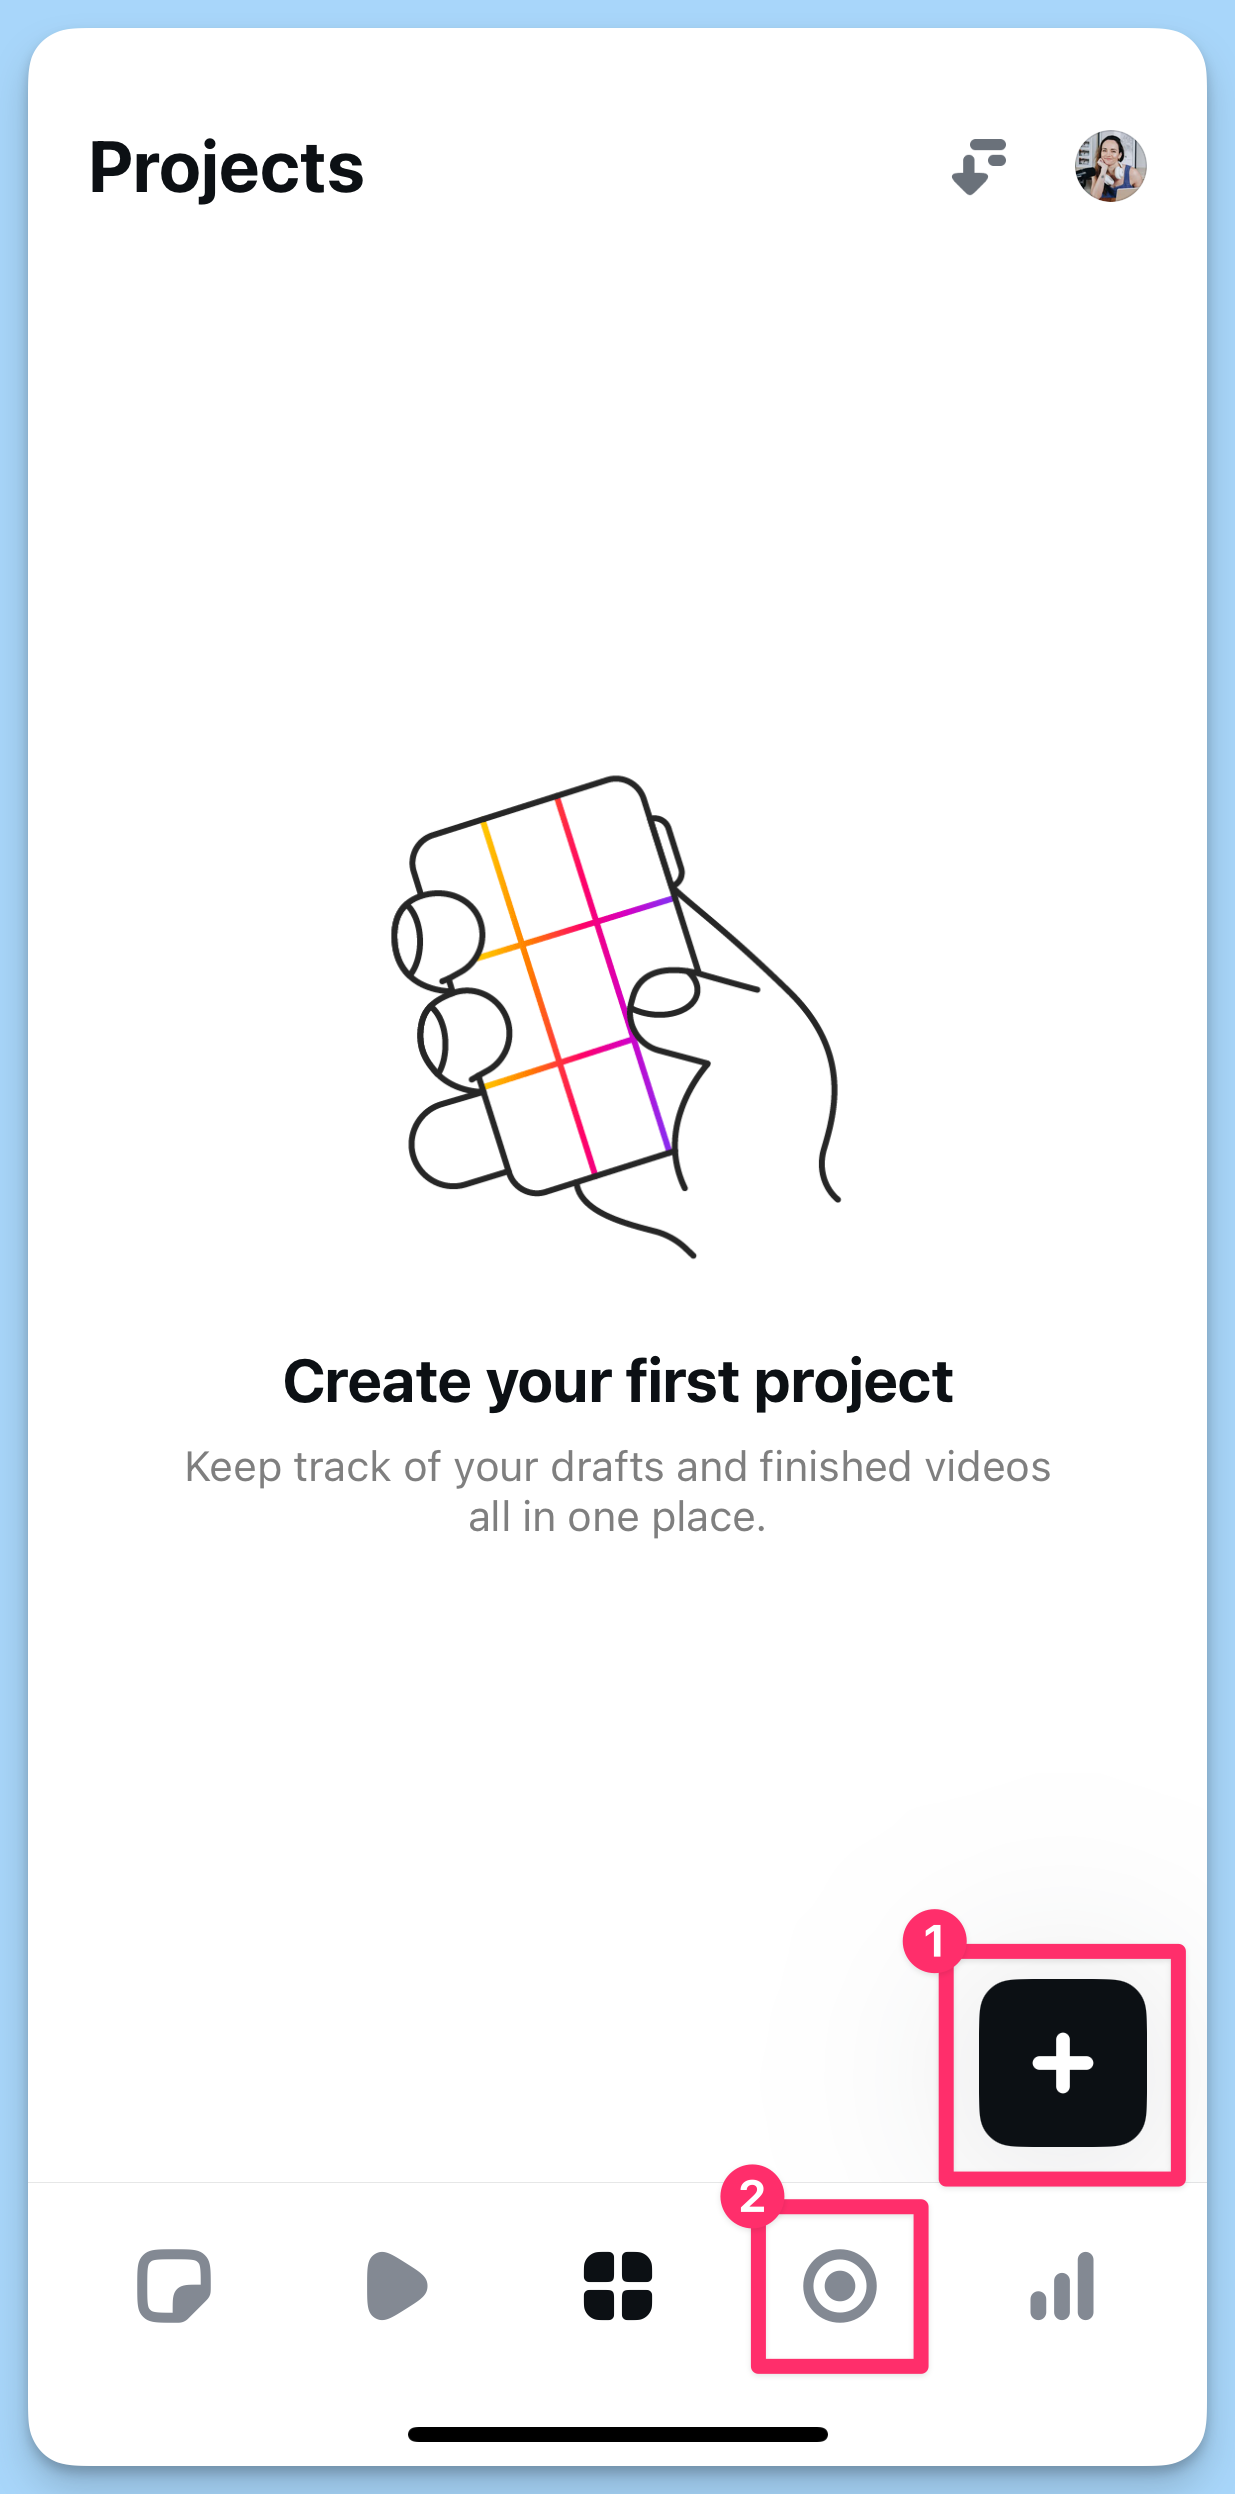
Step 2: Create a project
Once you’re in, you can either record directly in the app (up to 10 minutes of footage) or upload existing clips from your camera roll. Handy if you’re editing on the go or batch-shooting for later.
- To add media from your camera roll, tap the ‘+’ button on the bottom right of the app.
- To record your own footage right in Edits, tap the ‘record’ button on the bottom menu bar.
⚡️ Pro tip: If you plan to record new clips and use footage from your camera roll, start by adding the footage first. You can record directly in the editor, too.
Step 3: Edit with the timeline
Nifty new features aside, the basics are where things are vastly improved from Instagram’s built-in editing tools — no more fiddly dragging and fumbling fingers. The frame-accurate timeline lets you trim, split, rearrange, and sync your clips with precision.
- To zoom in on the timeline and get ultra-precise, pinch your fingers together. Pull them apart to zoom out.
- To reorder your clips, tap and hold on the one you want to move. Keep holding while you drop it into position.
Here’s a quick overview of all the changes you can make to your clips in the timeline (tap on the clip you want to edit to highlight it, and these options will appear):
- Split: Cut your clip at a specific point in the timeline
- Volume: Adjust or mute the sound
- Adjust: Play around with brightness, contrast, warmth, etc.
- Speed: Slow the clip down or speed it up (up to 10x speed).
- Delete: Remove the clip from the timeline (don’t worry, there’s a handy ‘undo’ arrow above the timeline).
- Filters: Choose from a range of filters (including a few IG OG’s like ‘Paris’ and ‘Jakarta’).
- Green screen: This opens your camera roll and removes your background, so you can record yourself over the footage already in your timeline. (More on this below.)
- Effects: Apply a handful of interesting effects, from zooms to strobe lights.
- Voice FX: Apply an effect to spoken audio from squeaky ‘Helium’ to creepy ‘Alien.’
- Extract audio: Detach the audio from a clip.
- Mirror: Flip the footage vertically.
- Replace: Swap the clip out with another one (maintaining the length).
- Slip: A handy way to select another moment from a clip.
- Duplicate: Add an exact copy of a clip to the timeline.
⚡️ Pro tip: Don’t miss checking out the filters. There are some really lovely, subtle ones that enhance your footage rather than make it look weird.
Step 4: Add effects, text, and audio
Beyond the fundamental edits, there are some really fun features in Edits that will help elevate your video. To access these options, make sure that no footage is selected on your timeline:
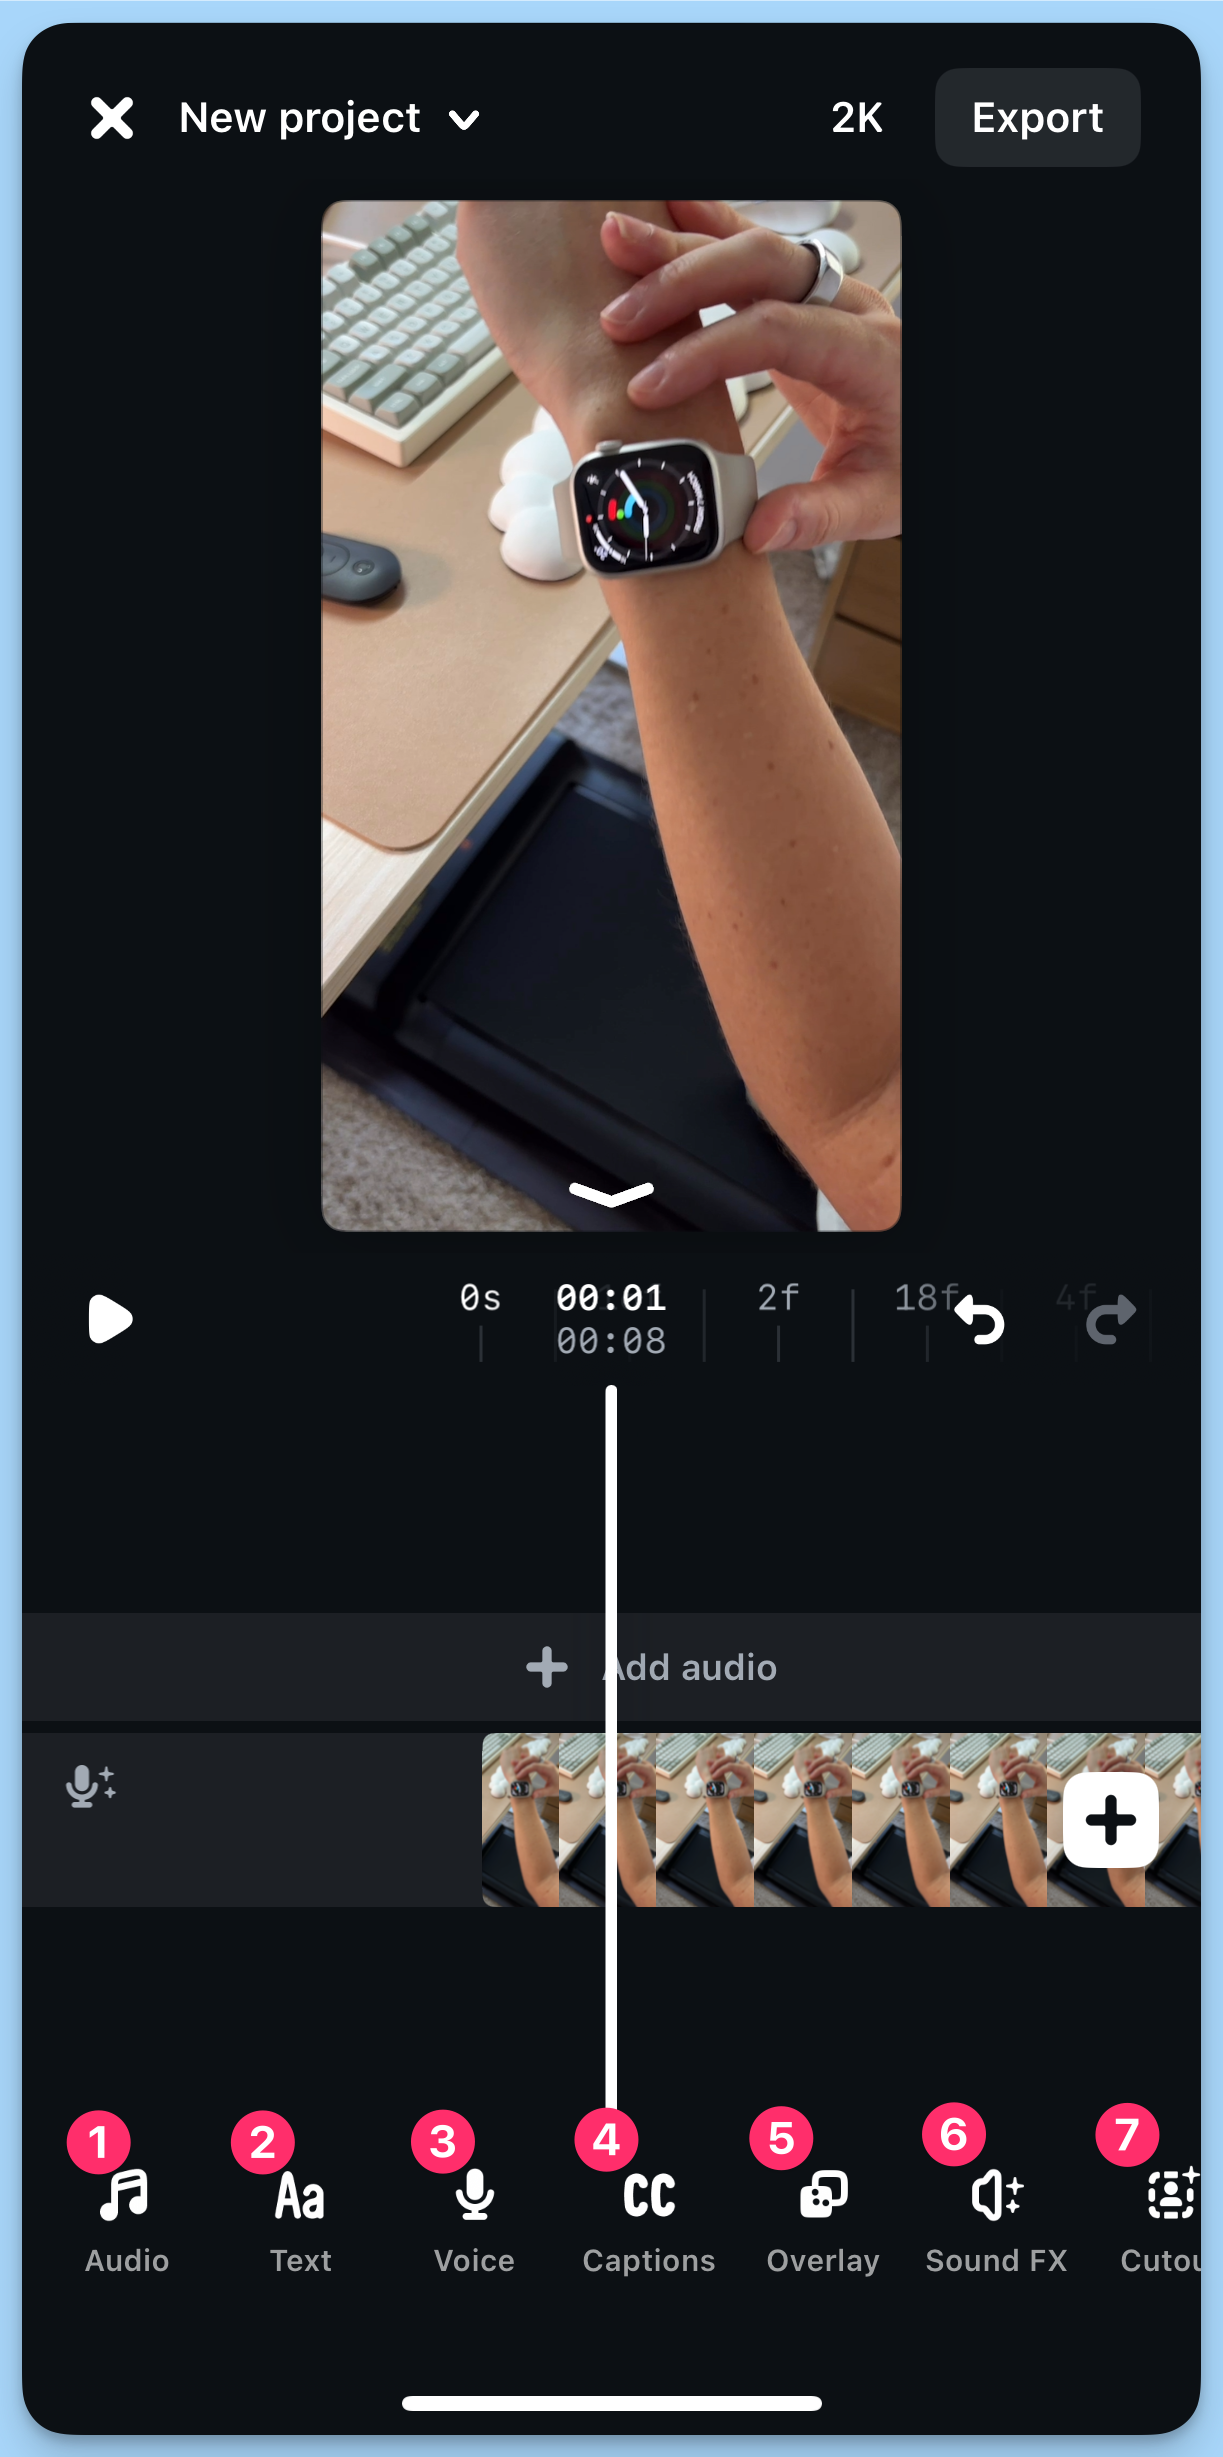
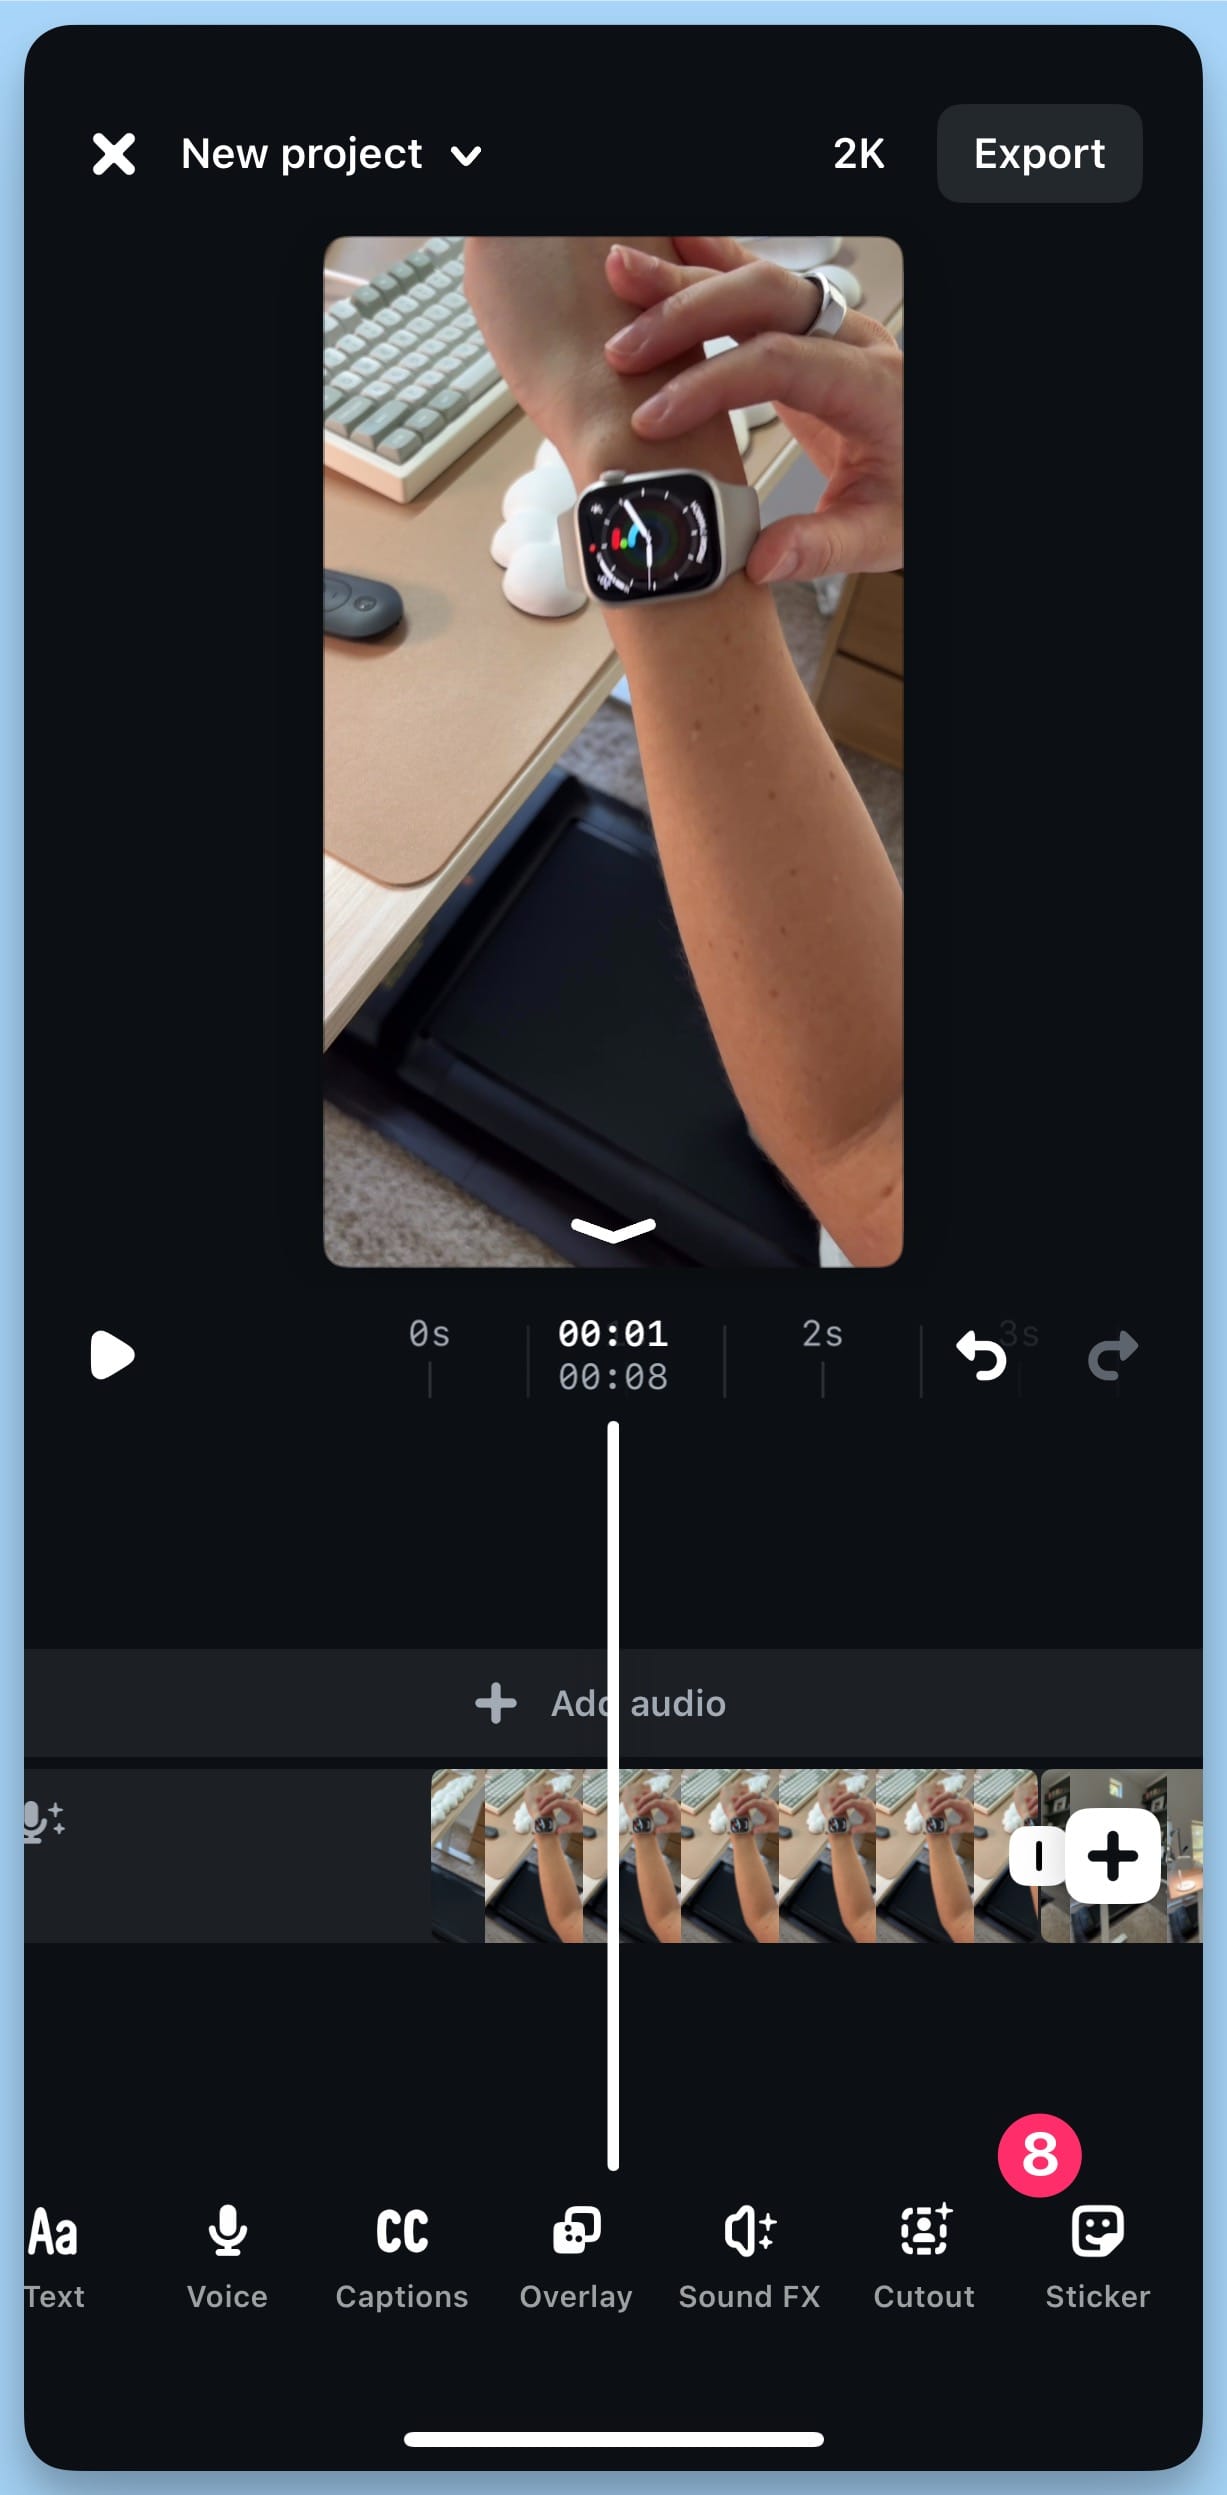
- Audio: Add sounds from within the Instagram app (any audio you’ve saved on Instagram will appear here, too).
- Text: Add text to your video. More on this below.
- Voice: Record a voiceover.
- Captions: Automatically detect captions.
- Overlay: Add an image or clip over the footage already in your timeline.
- Sound FX: Add fun sound effects. More on this below.
- Cutout: Add a portion of an image or clip as an overlay. More on this below, too.
- Sticker: It wouldn’t be Instagram without stickers, would it? Add some beloved and new sticker designs and GIFs.
Step 5: Export + post anywhere
Once you’re happy with the result, export in high-quality, watermark-free format (up to 4K!) — perfect for posting to Instagram, or any other short-form video platforms.
The video will save to your camera roll, and you’ll also be prompted to post directly on Instagram or Facebook.
7 Instagram Edits tips and tricks to help you level up your next video
Edits is not Instagram — there’s so much more you can do here than you would be able to in the social media platform’s own, basic editing tools.
Here are some ways you can get the most out of the new app:
1. Save ideas and inspiration
If you’re anything like me, you get your best ideas while anywhere but your desk — so having a place to store them all on the go is really handy.
With Edits, you can save ideas as cute sticky notes inside the app by tapping the sticky note icon on the bottom left. To create a new note, tap the ‘+’ icon on the bottom right.
Here, you’ll also find all your saved reels from Instagram by tapping the ‘Saved’ button at the top, as well as your Instagram collections.
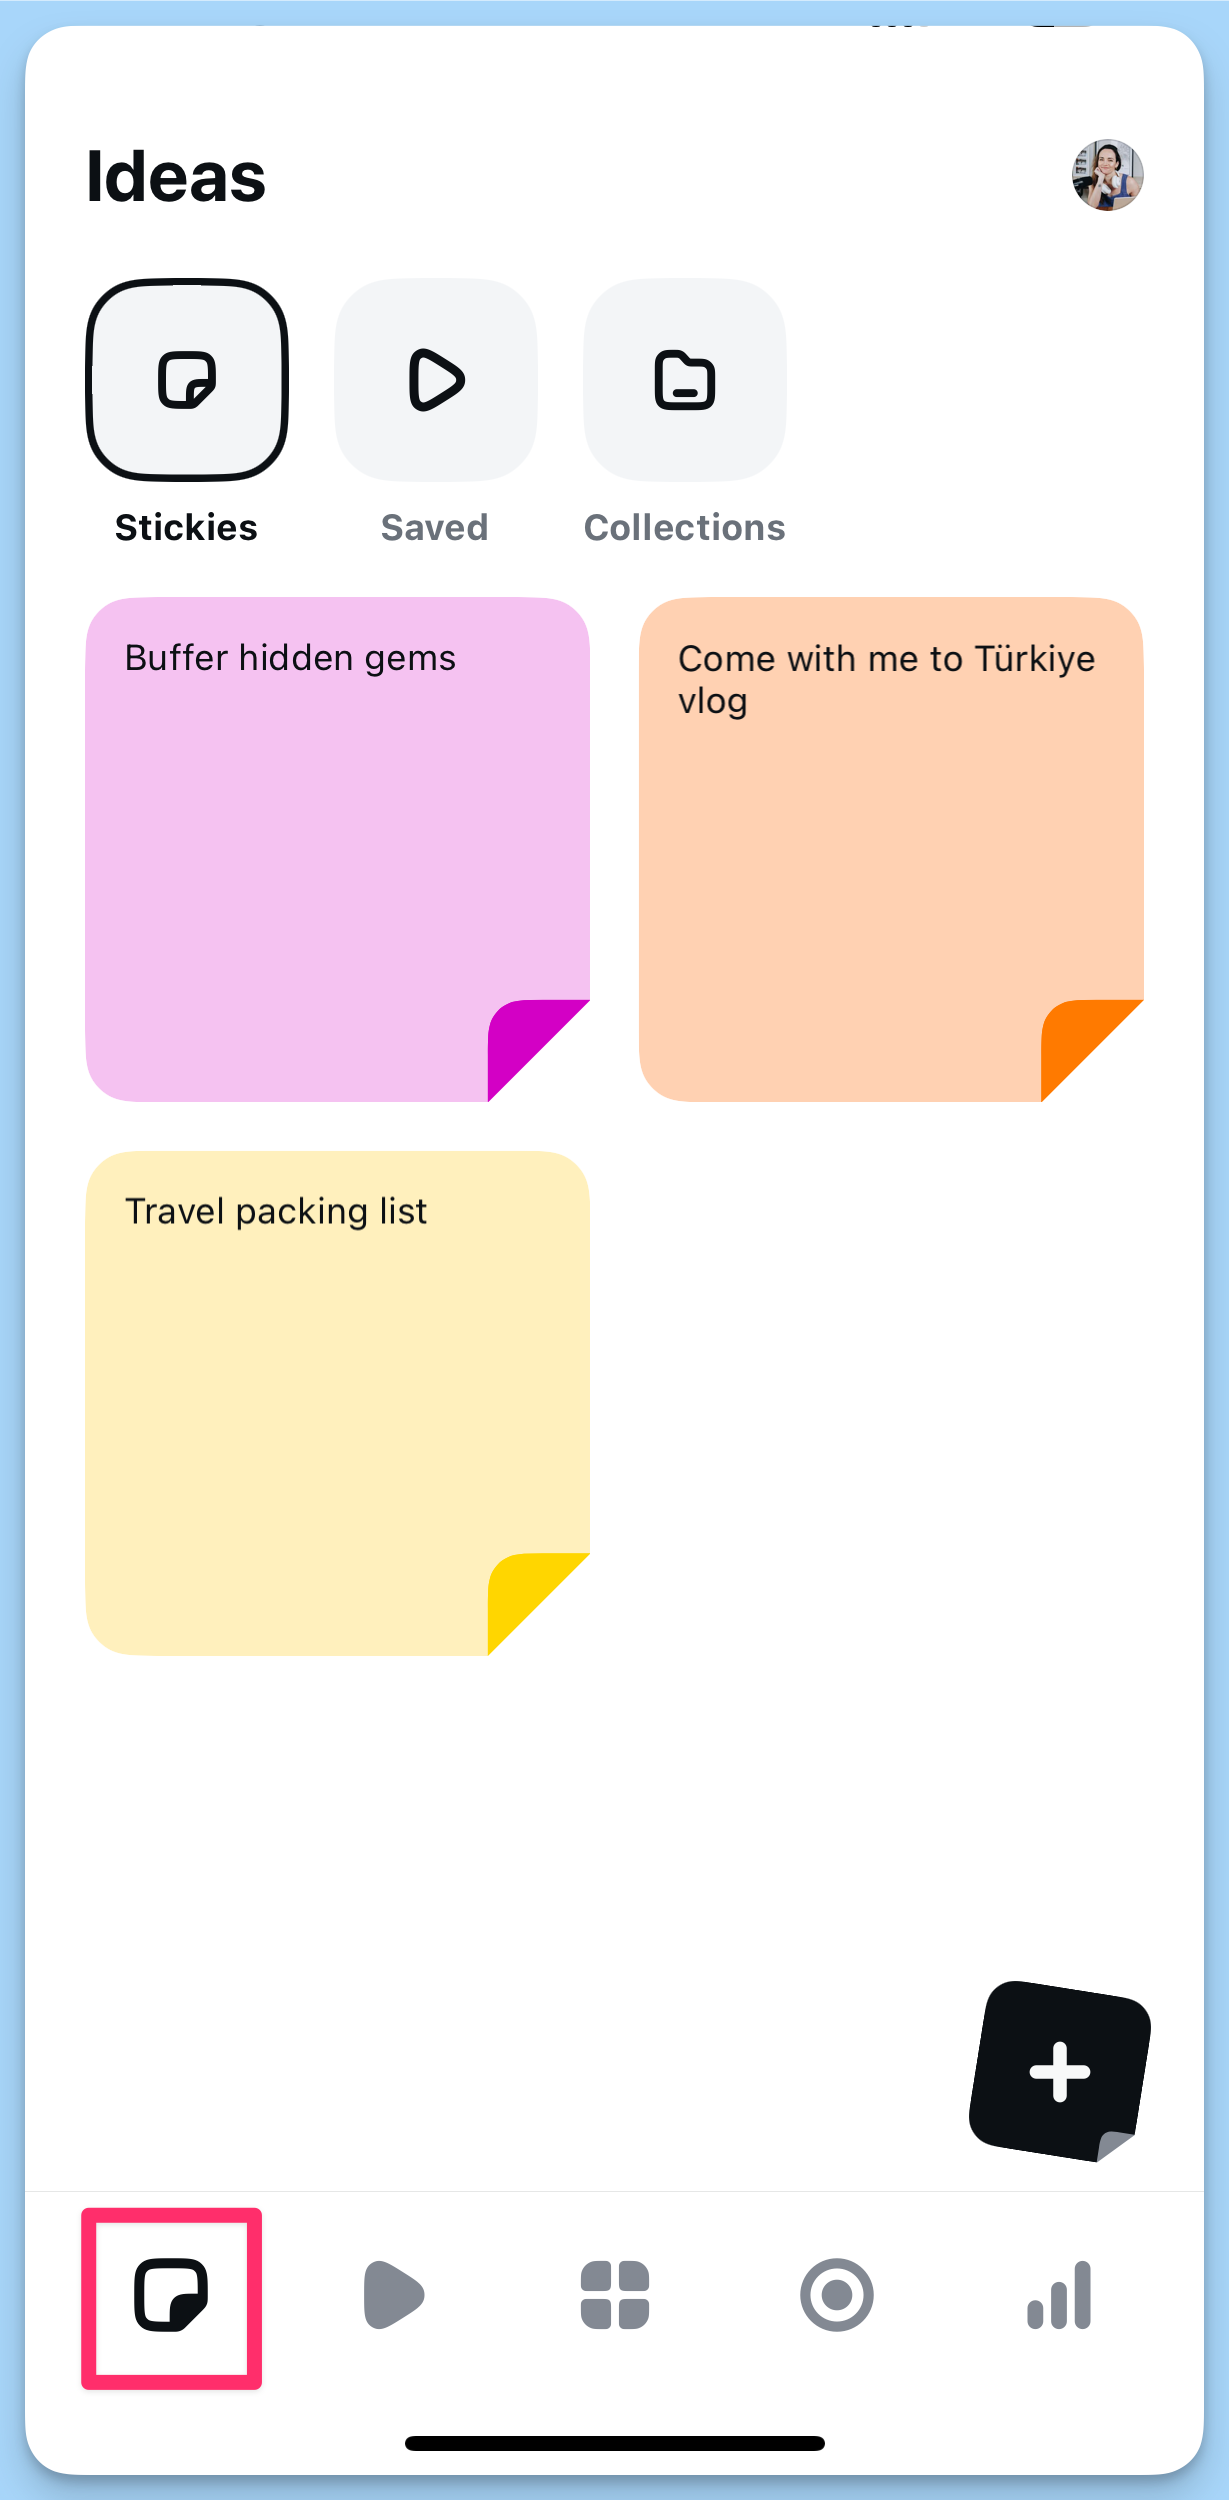
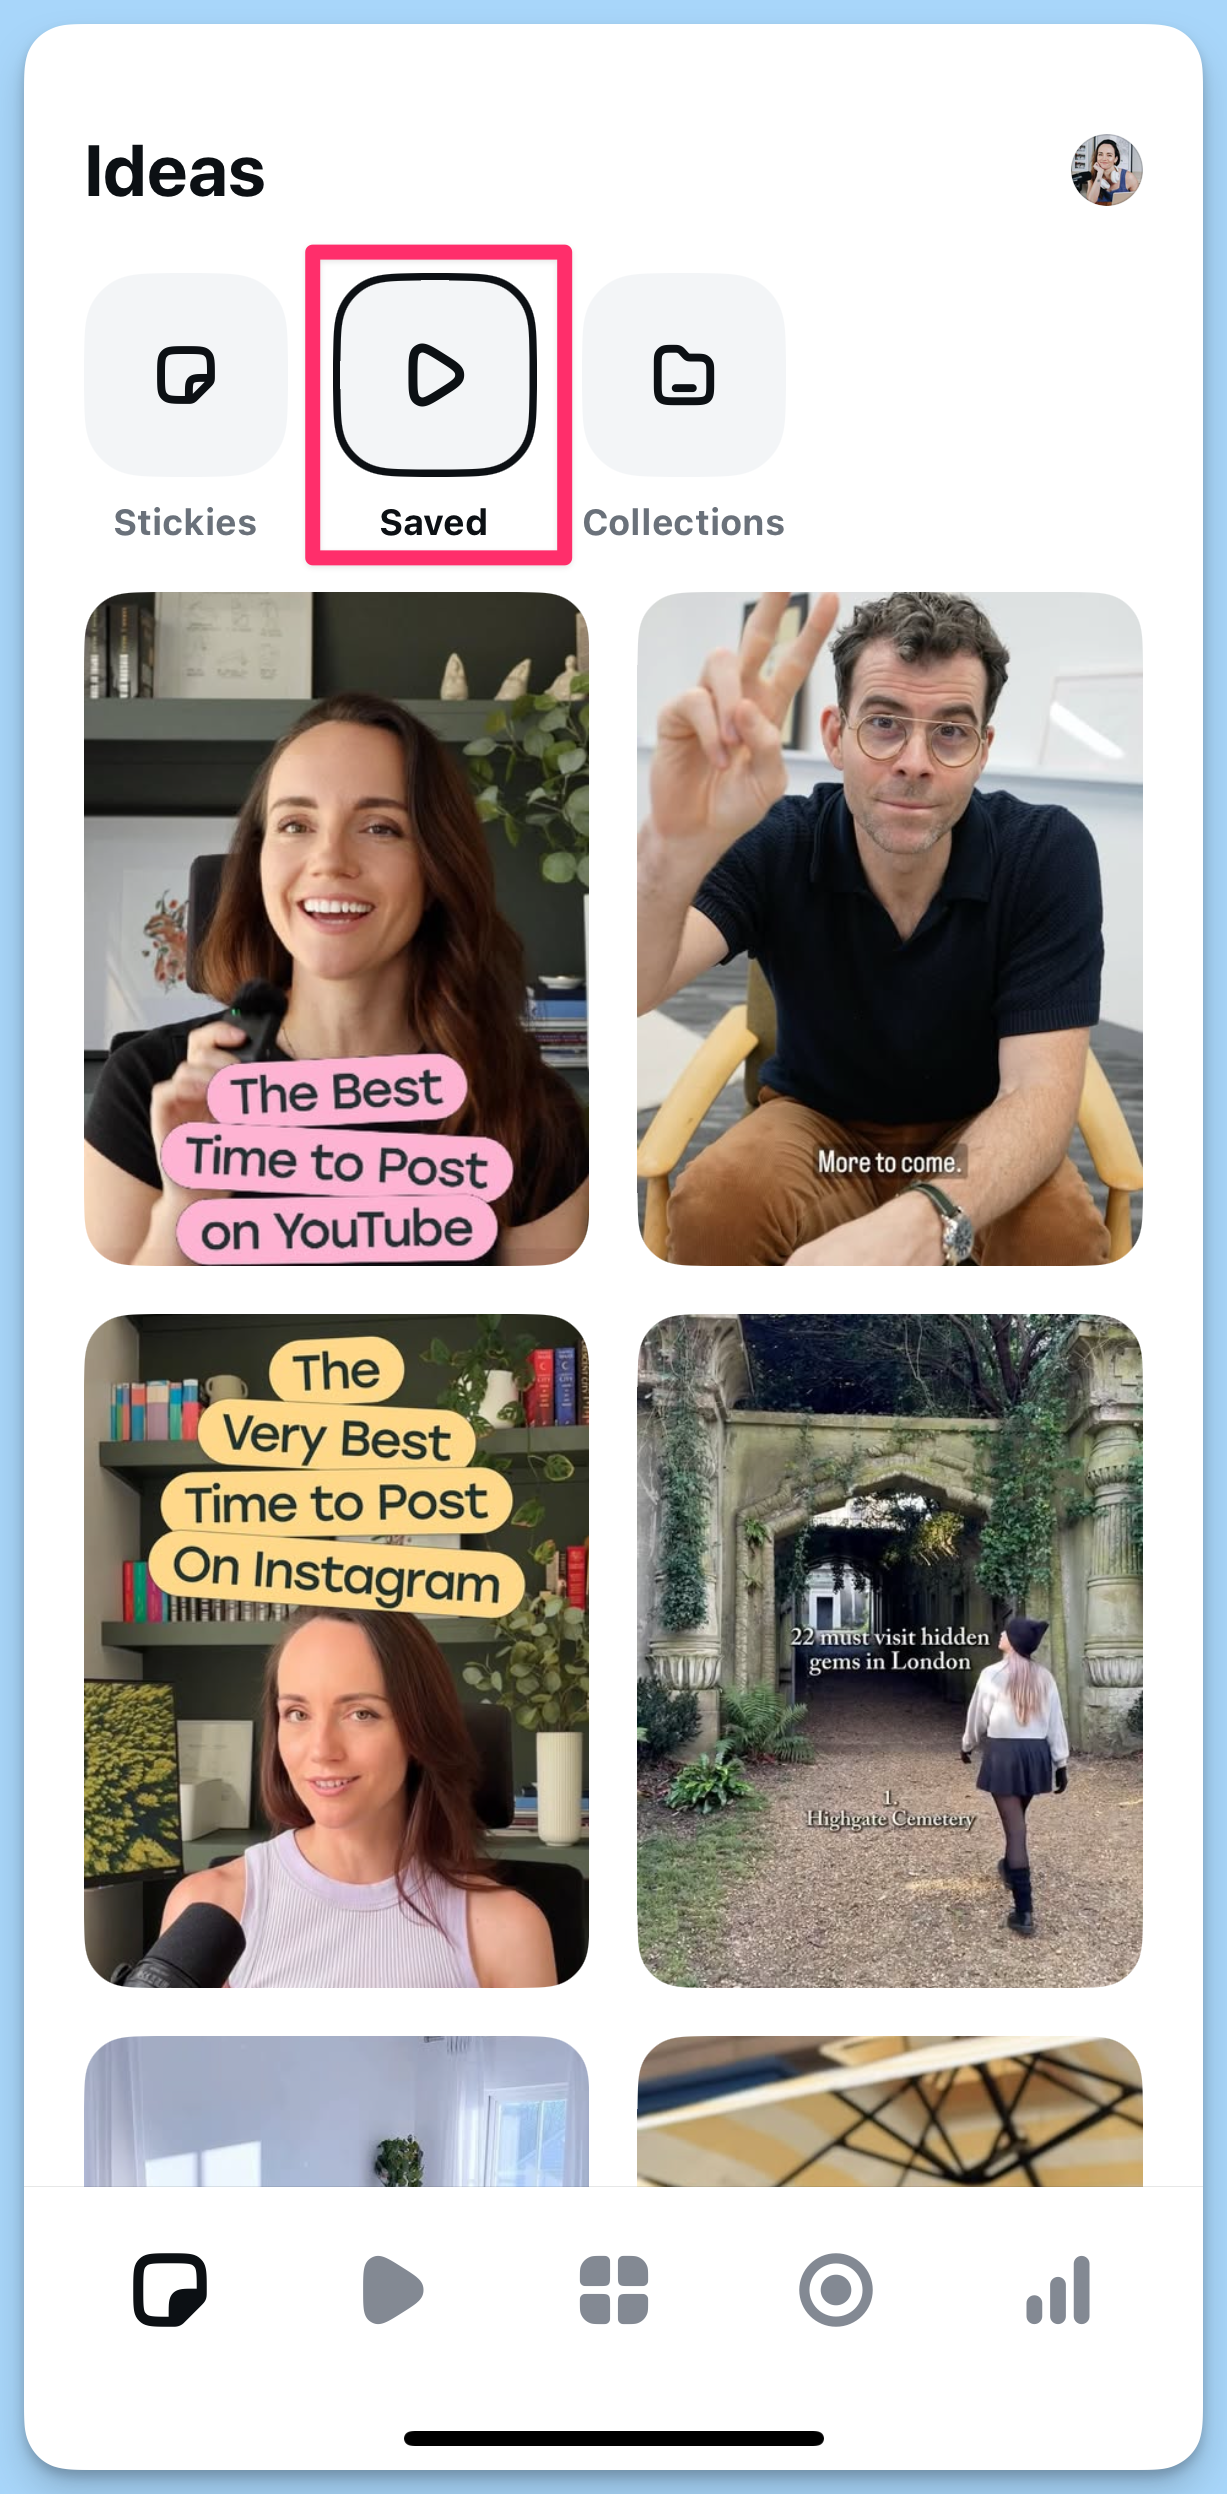
⚡️ Pro tip: Get into the habit of saving any reels that feature audio you’d like to use on Instagram. They’ll appear right in your Edits app, complete with a ‘Use audio’ button that automatically creates a new project with that audio already on the timeline.
2. Experiment with new fonts
If you’re a little tired of Instagram’s native fonts, you’ll be delighted to hear that Modern, Classic, Typewriter, and co. are far from the only options.
There are around 50 new fonts to experiment with in the app, all helpfully organized into categories like ‘Simple,’ ‘Bold,’ and ‘Handwritten.’
Each font can be customized, too, with scores of fun animations, styles (also animated), and background options to play with.
Discovering aesthetic combinations is one of my favorite new Edits features. There are enough fonts for you to really experiment, but not so many that it becomes overwhelming (I’m talking to you, CapCut).
3. Use the green screen for low-edit wins
Adding a talking head overlay is one of the best ways to explain something on video — but the editing can be really, really fiddly.
The only tool to have really made this simple is TikTok, but as seasoned creators will know, it’s best not to upload videos made in TikTok to Instagram (unless you’re comfortable removing the watermark).
Enter Edits: The app has made recording off-the-cuff green screen videos really smooth.
To do so, add your background footage or image to a new project first, then tap the green screen button underneath the timeline (pictured above). You can play around with the placement and size of your green screen overlay by pinching your fingers and dragging it around.
As you record, the background video will play, so you can actually see what you’re talking about as you film.
The only drawback to this approach is that there is no way to edit the green screen recording once you’re done, but I found I rather liked the simplicity of this. Cutting and moving green screen footage around can often make more of a mess than whatever you’re trying to clean up.
Of course, there is a way to record an editable green screen — though you won’t see your background footage as you film. You’ll just need to use your regular phone camera to film the green screen clip, then use the cutout feature, below.
4. Get creative with cutouts
This might just be my favorite Edit’s feature — it just has so much potential for some really creative, well, edits.
Cutout lets you add a portion of another clip or image over another. You can manually choose what part of the media you want, or Edits chooses it automatically.
Here’s how it auto-selected this cutout:
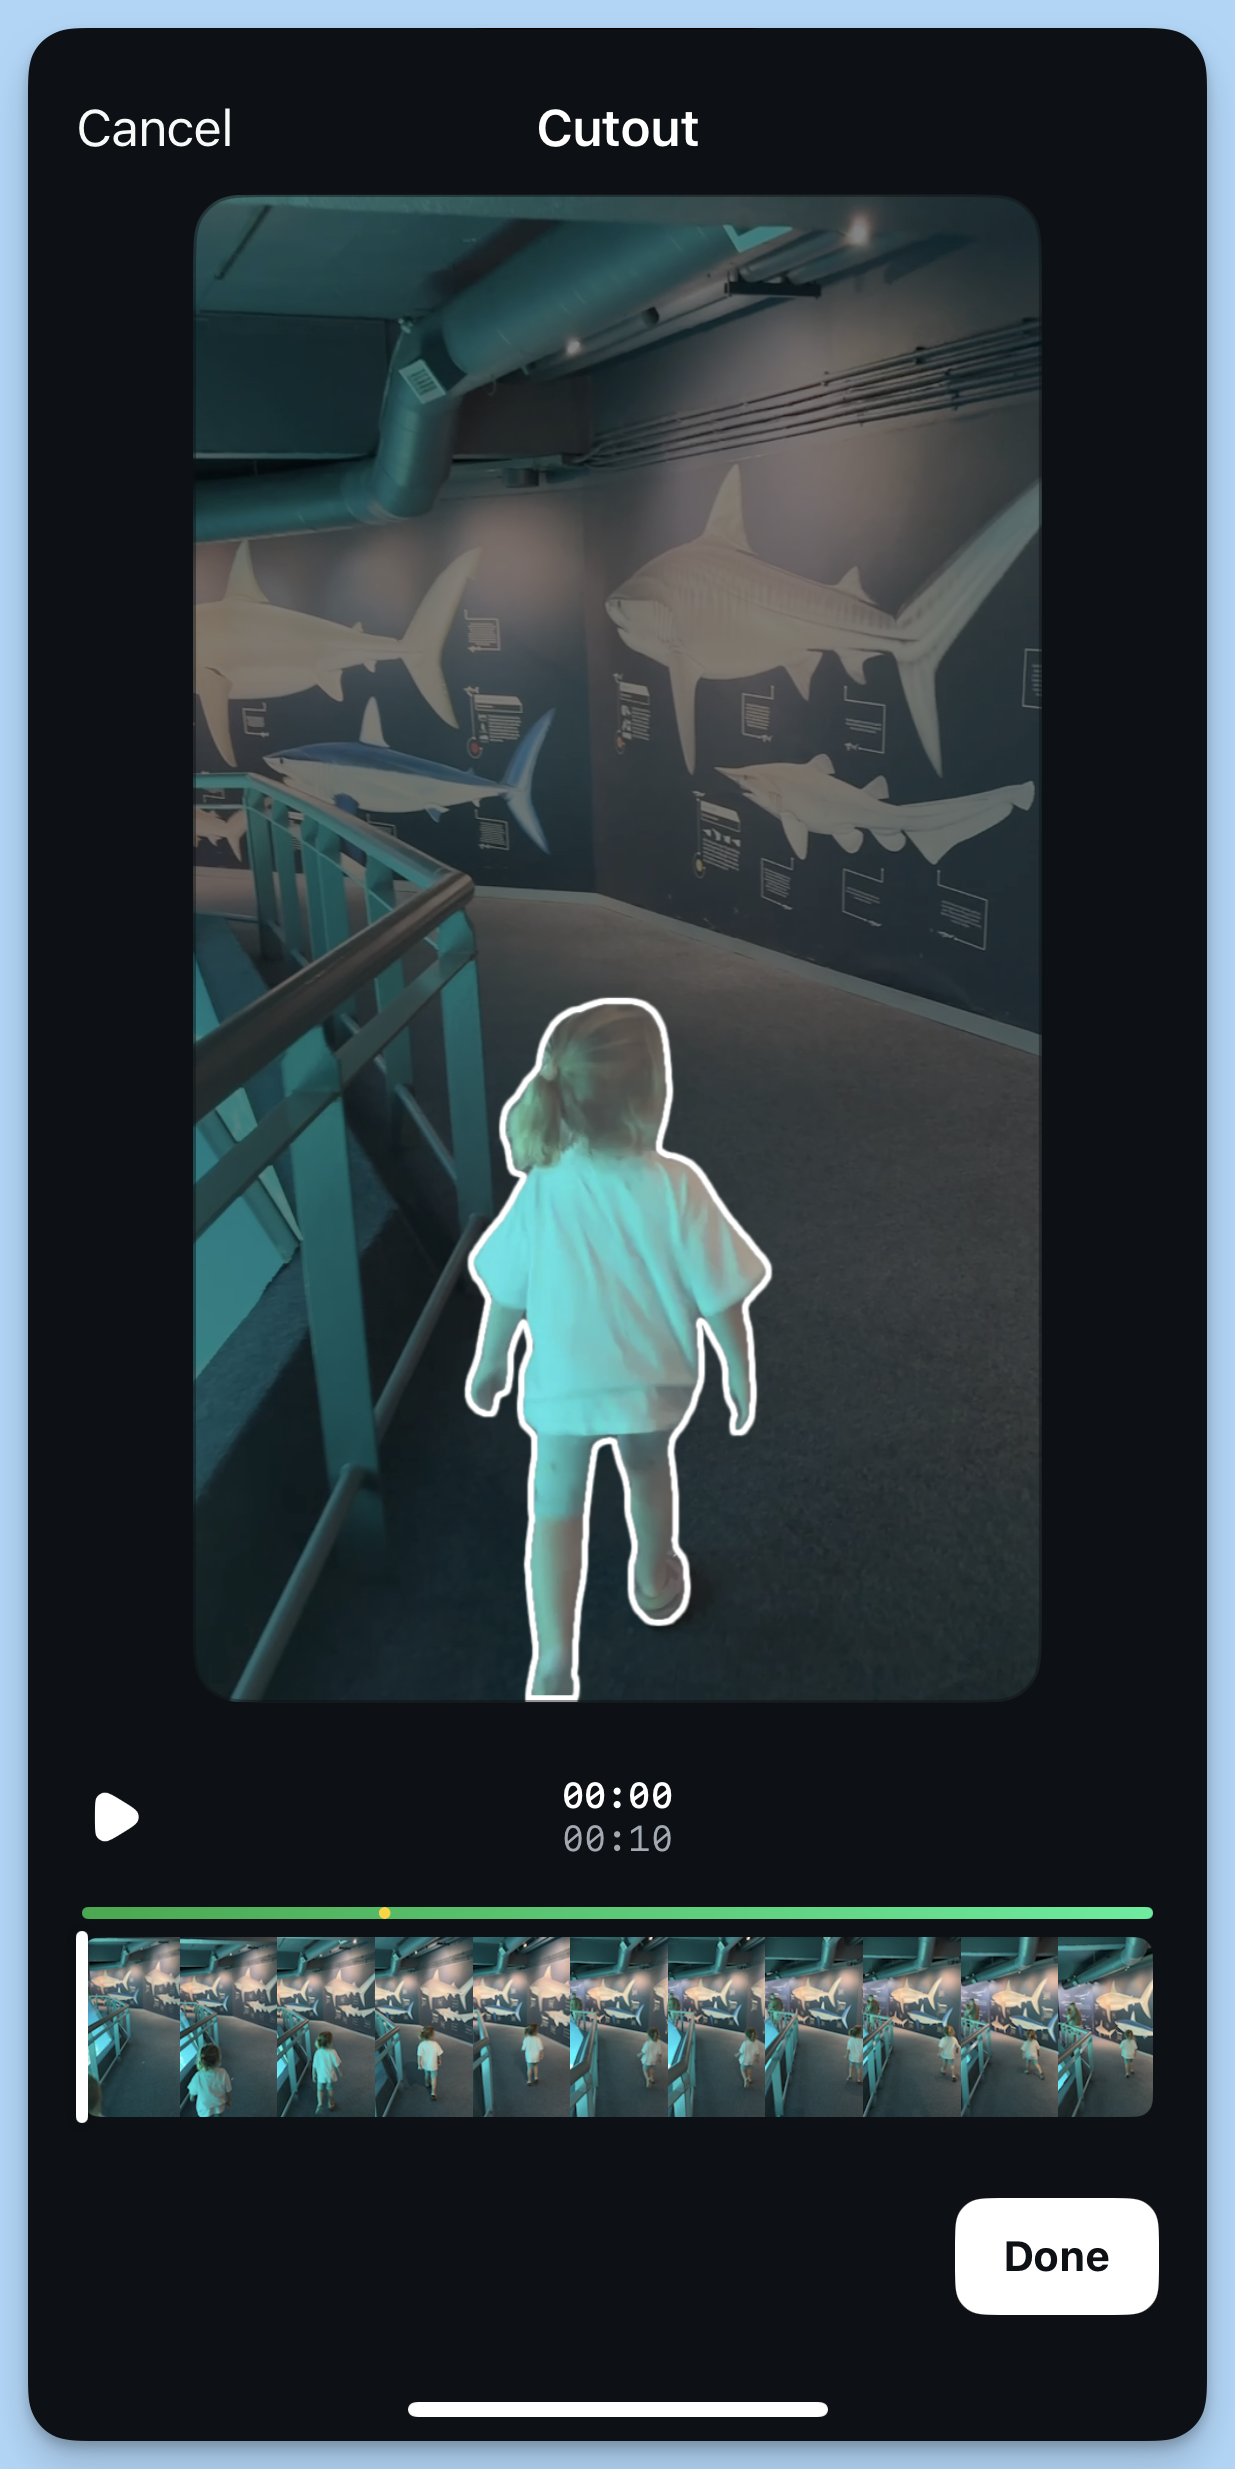
I was able to layer several of the same clip on top of each other with this feature, having my daughter appear three times in the same scene.
All that said, my hope was that this feature would allow me to layer cutouts over text (a bit like I’ve done in this video, which took ages of fiddly work on CapCut desktop).
But, a bit frustratingly, you can’t add a cutout over text in Edits right now. It will always appear on top of all the elements in your timeline. Here’s hoping the Instagram team adds this soon! 🤞
5. Don’t be shy with sound effects
One of my favorite hacks for elevating a video from good to scroll-stopping is to add sound effects. But many video editors don’t have these built in, and those that do (CapCut again) always seem to be oddly named, so it’s difficult to find what you’re after.
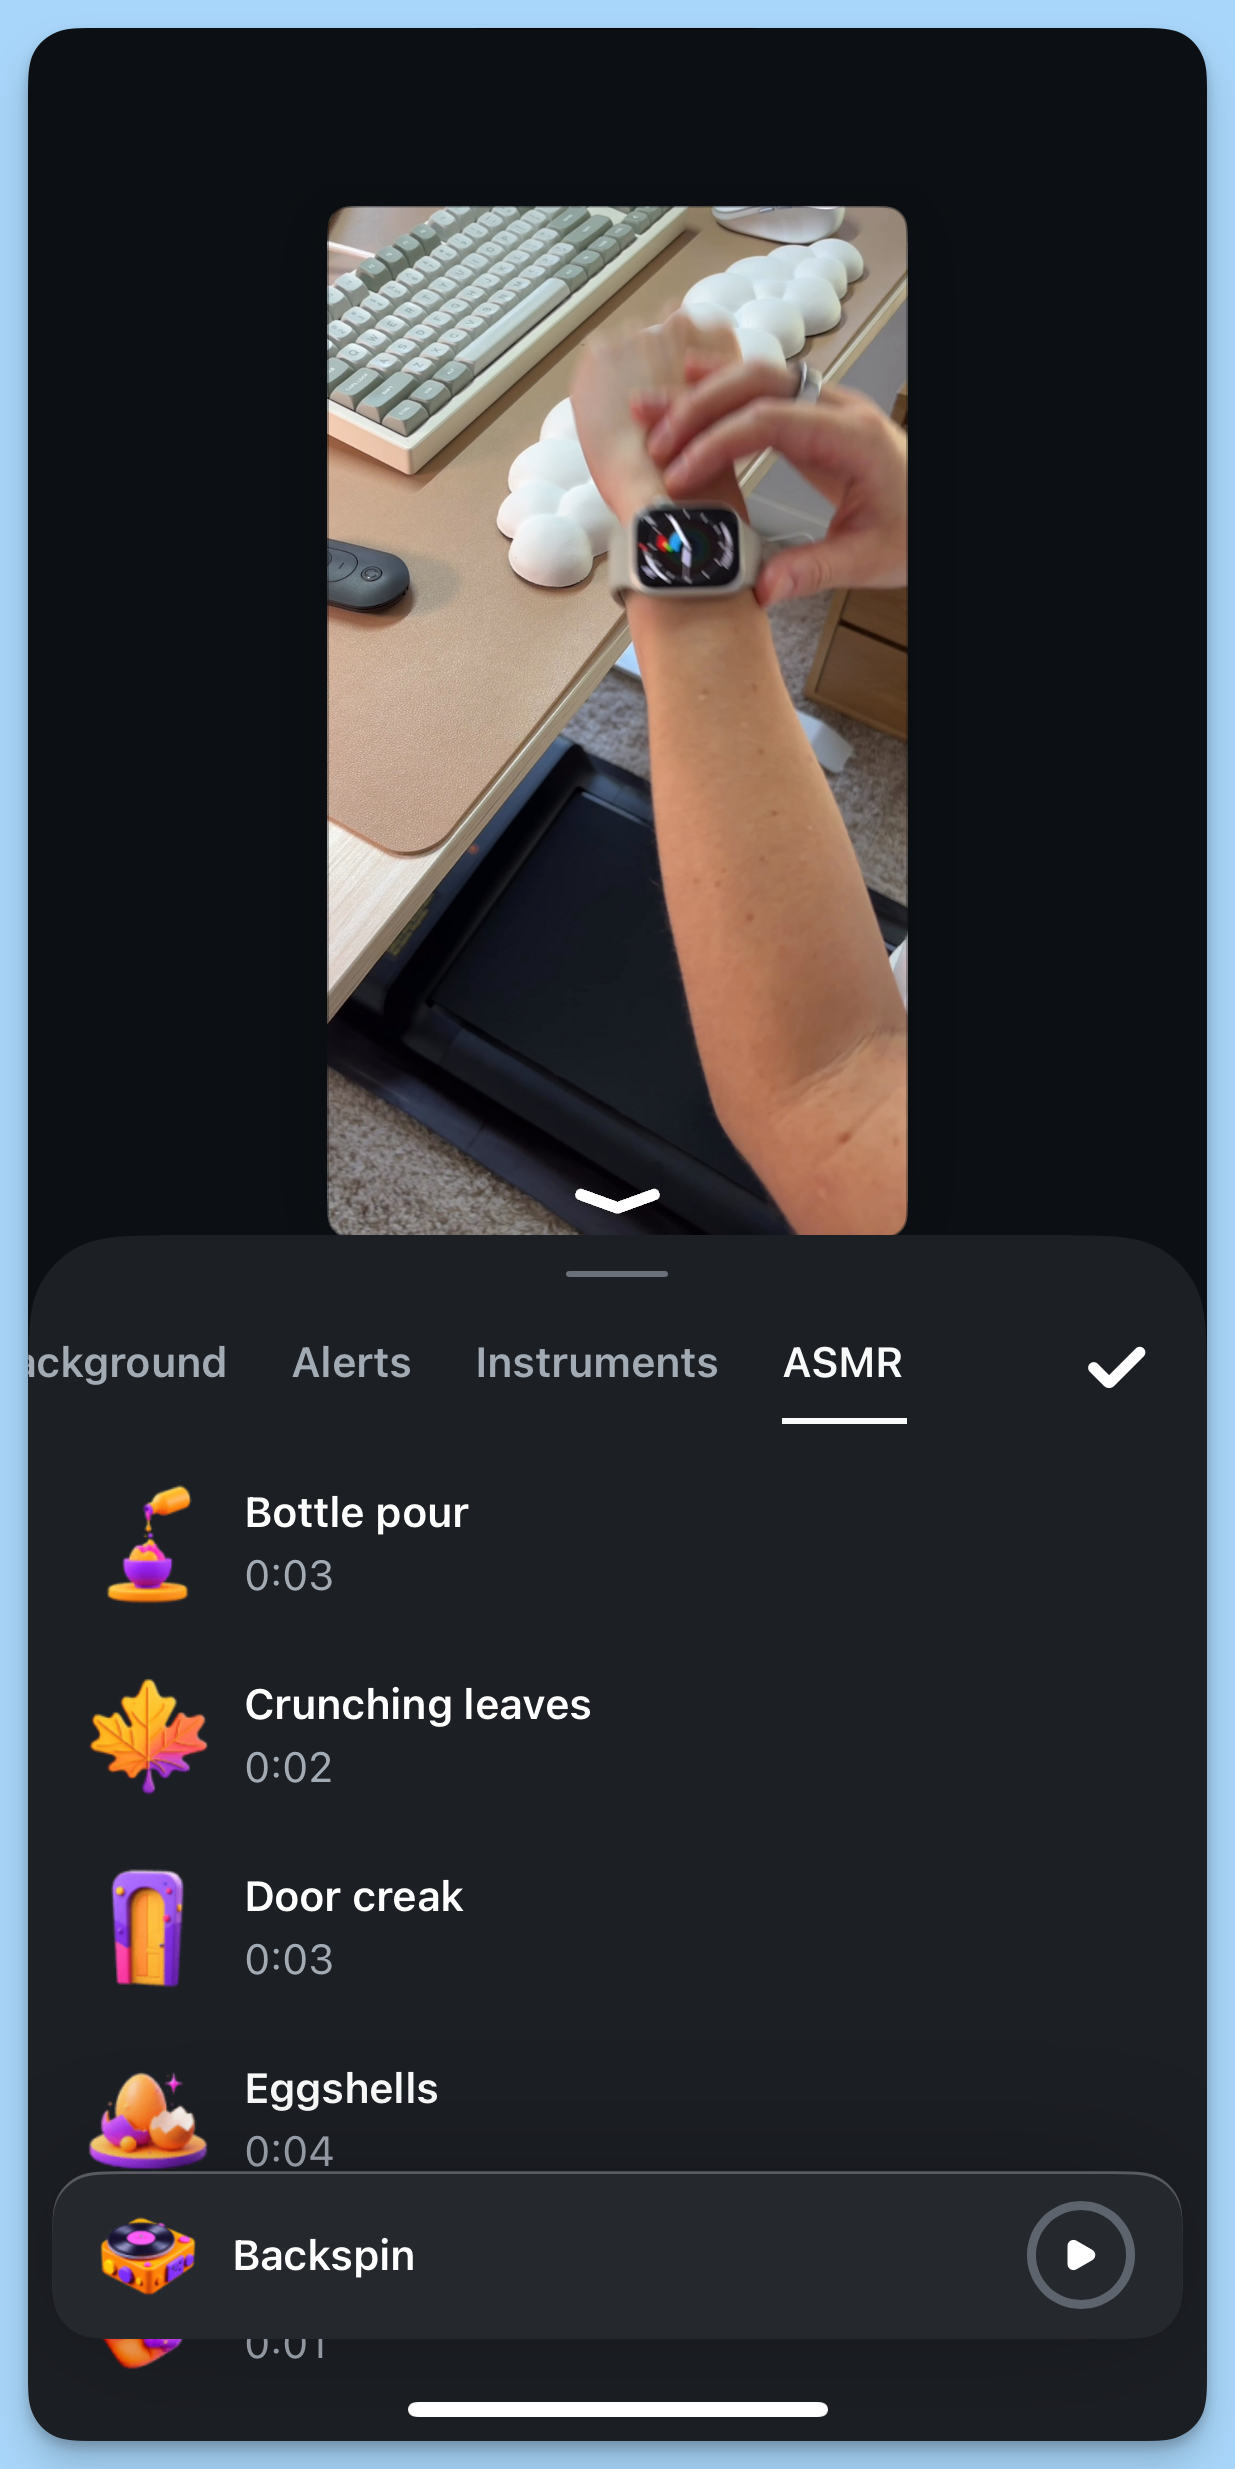
Not only does Edits have its own sound effects you can add right in the app — there are around 50 here too — they’re also organized into neat categories and feature their own icons. Easy to find exactly what you need at a glance.
To use sound effects to their best advantage, I like to add things like bubble pops or clicks when text appears on screen, or even subtle swooshes for rapid transitions.
6. Scroll through trends to get inspired
Finding fun formats and trending audio on Instagram can be a little tricky — you have to rely on the algorithm, hoping to stumble on something that will work for you.
But Edits pulls them right into their native video tab. It’s your reels feed, but only with trending videos.
Tap on the video icon at the bottom left of the app to navigate there, and get scrolling. When you find an audio you like, you can even tap the ‘Use audio’ button to open a new project with that audio already on the timeline.
7. Let insights guide your next move
Edits has made it even easier to learn from your Instagram analytics by bringing them right into the app.
Tapping the graph icon on the bottom right of Edits will open real-time Insights for all your reels for the last 7-60 days. Tapping on one will open up in-depth metrics, including some interesting ones exclusive to the Edits experience (like skip rate, like rate, and share rate).
There’s even a retention graph that shows you when your viewers started dropping off the video (helping you pinpoint what works and what makes your audience lose interest.
If you’re an Instagram creator, Edits is a no-brainer
Edits brings your entire video process — ideas, filming, editing, exporting — into one intuitive, creator-first space.
There are new features coming soon, too, like:
- Key frames: Pinpoint exact moments for adjustments to your video’s timing, motion and effects.
- Modify: Change the look and feel of your videos with AI effects, using prompts.
- Collaboration: Share drafts with your team, other creators, or brands for feedback.
- More effects: Even more fonts, text animations, transitions, voice effects, filters, and music options, including royalty-free.
Will Edits replace CapCut? If you’re an Instagram-first creator, absolutely. But if you’re focused on longer, more complicated videos, say, for YouTube, you’ll probably be inclined to stick with your current set-up (especially if you prefer to create on desktop).
Edits is brilliant for short-form content, but it’s probably not best suited for advanced creators who want all the bells and whistles they can get from more comprehensive tools.
But if you’re looking for a beginner-friendly video editing app, Edits might be exactly what you need.
🎥 Edits is available now on iOS and Android.